
Set up your syndicate after skipping onboarding
The welcome screen’s Skip onboarding: launch demo button doesn’t set your syndicate up. It drops you into a ready-made demo syndicate, filled with a sample aircraft, bookings, and members, so you can look around before committing. Nothing in the demo is real, and nothing you do there affects a syndicate you create later.
When you’re ready to run your own group, you build it yourself from the admin screens. This tutorial does that end to end, and leaves you where the setup wizard would have: a syndicate with one aircraft, a rate, and an invitation out to your first member.
Because the demo counts as a syndicate on your account, the setup wizard won’t reappear (it only shows when you have none). That’s expected. From here you add your real syndicate directly, using the same handful of screens the wizard wraps.
Before you begin, it helps to have a few things to hand:
- A name for your syndicate.
- Your aircraft’s tail number and today’s reading on the meter you bill by.
- The rate a member pays per flying hour, plus your home airfield’s ICAO code if you charge landing fees.
- The email address of your first member.
Anything you’re missing can be filled in afterwards.
Step 1: Create your real syndicate
Section titled “Step 1: Create your real syndicate”Go to the Home tab. Your syndicates sit in the list; below them is a dashed Create Another Group card. Tap it.
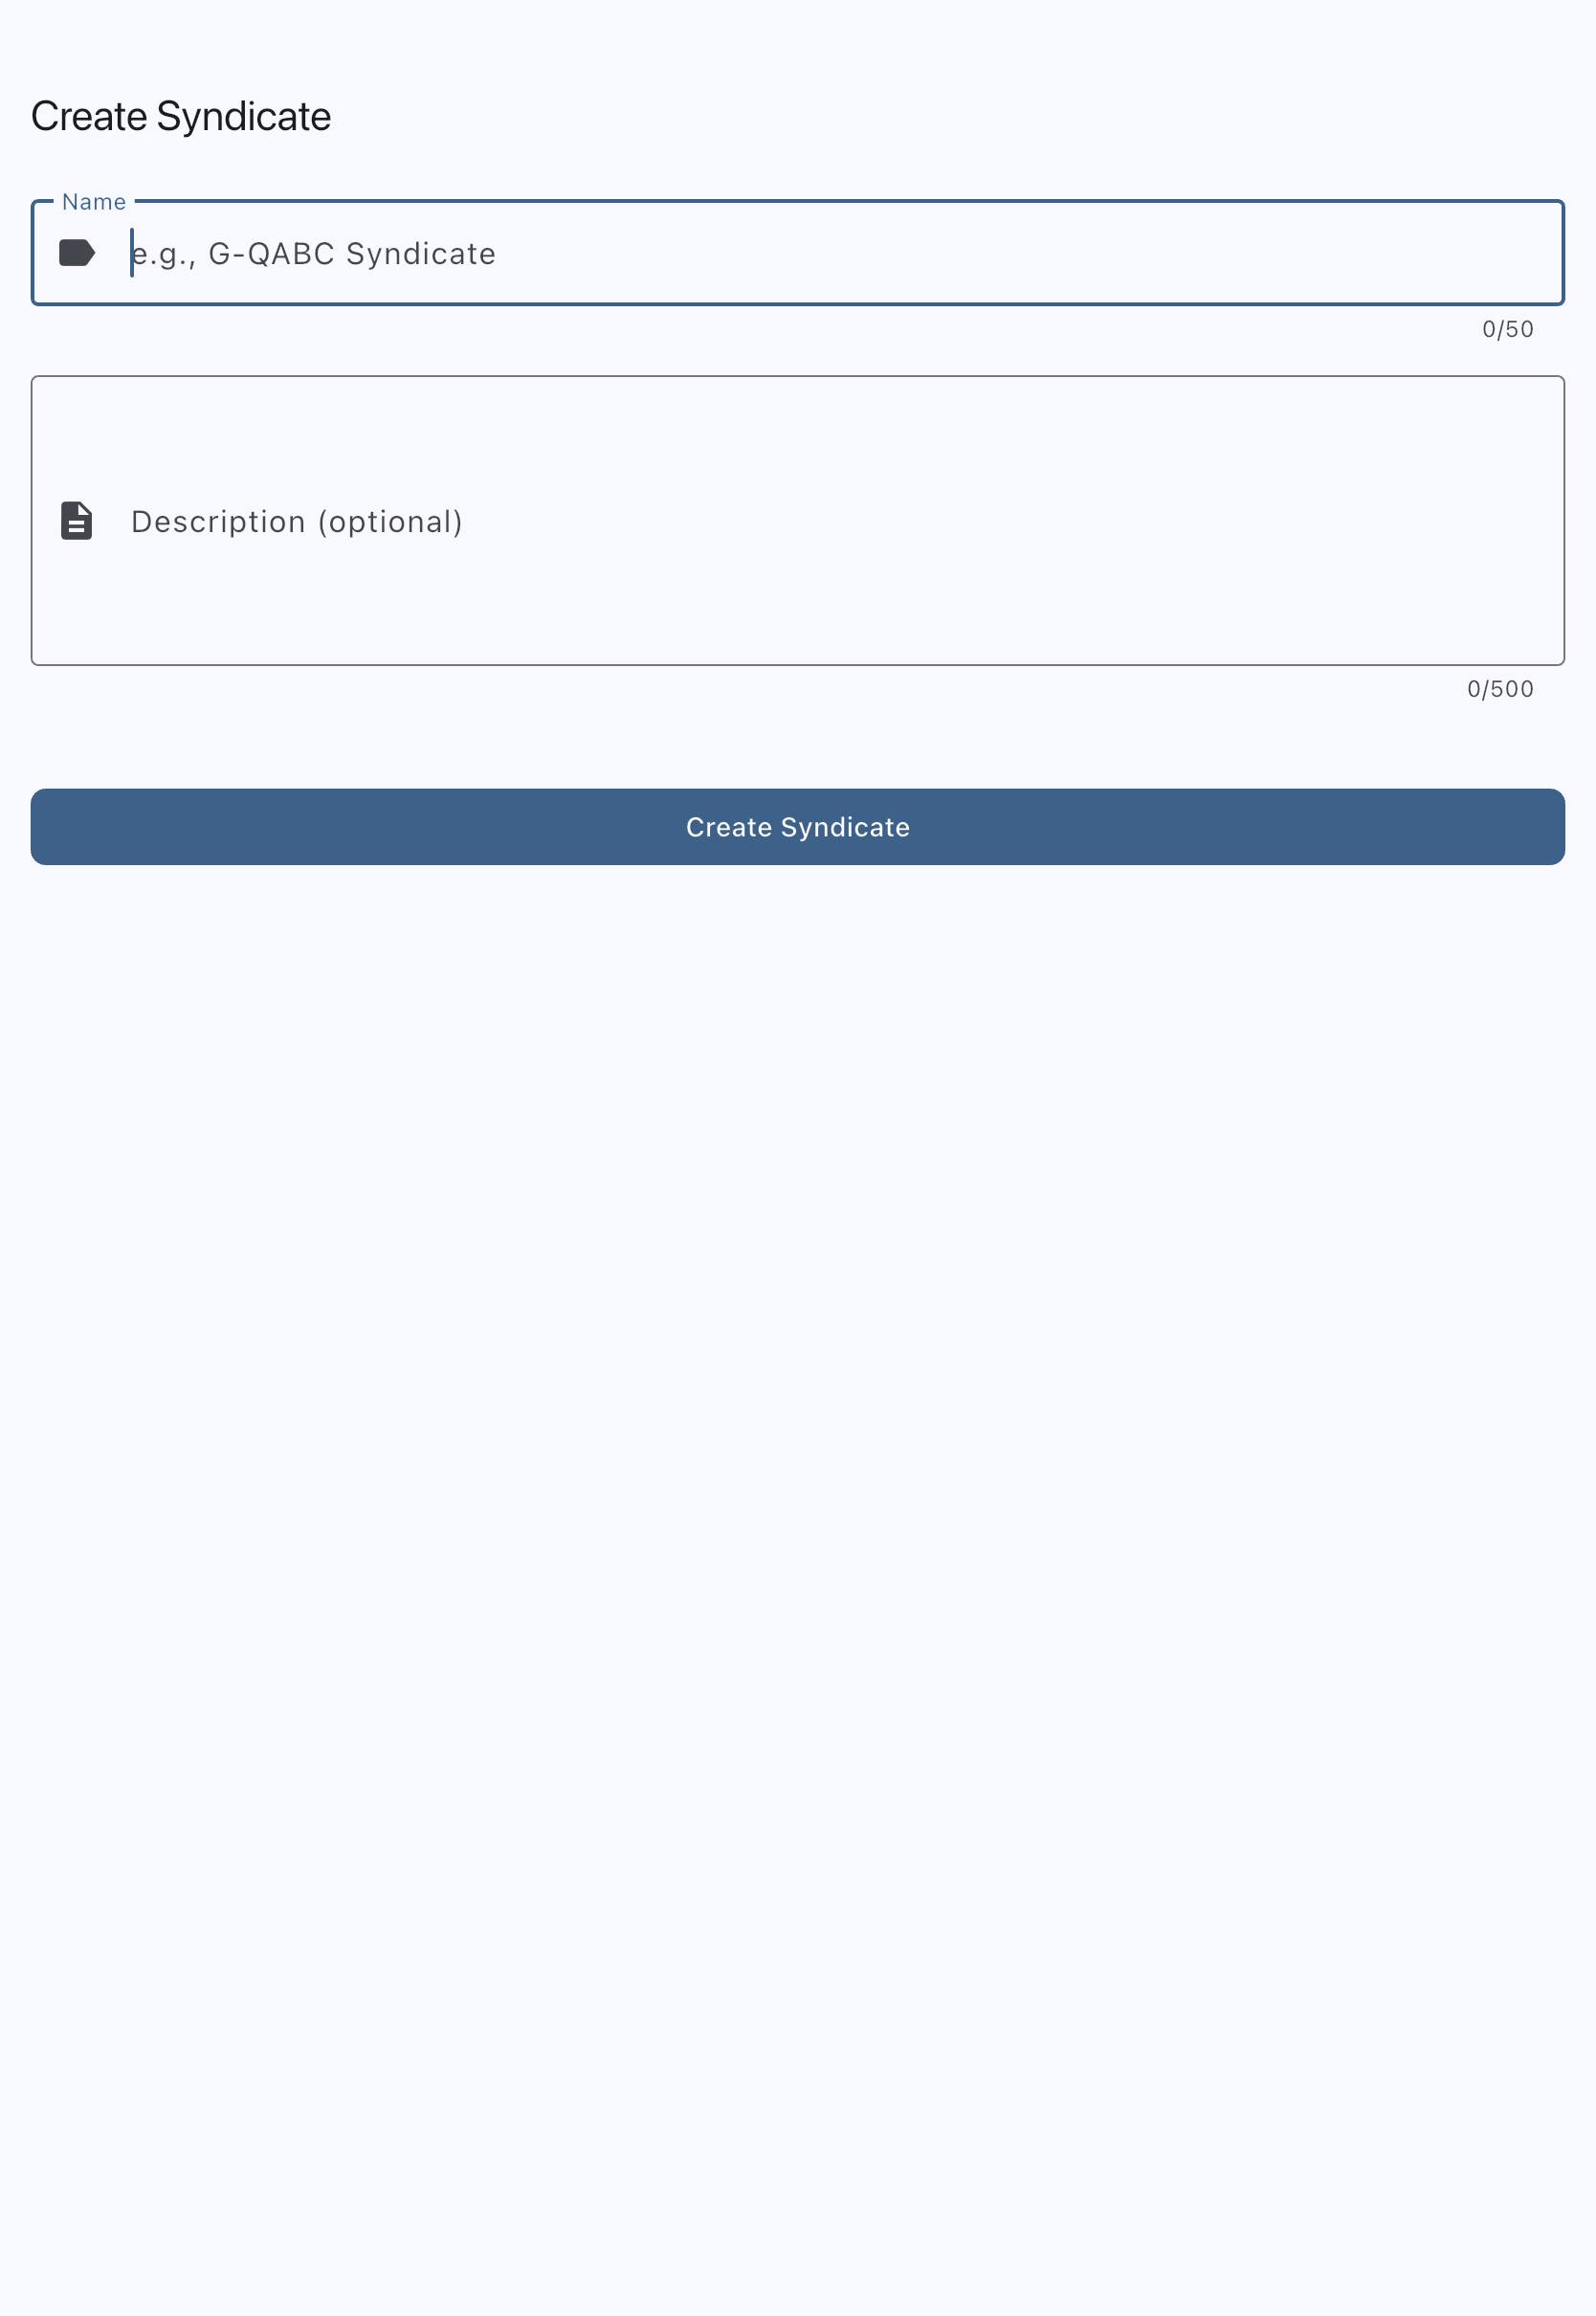
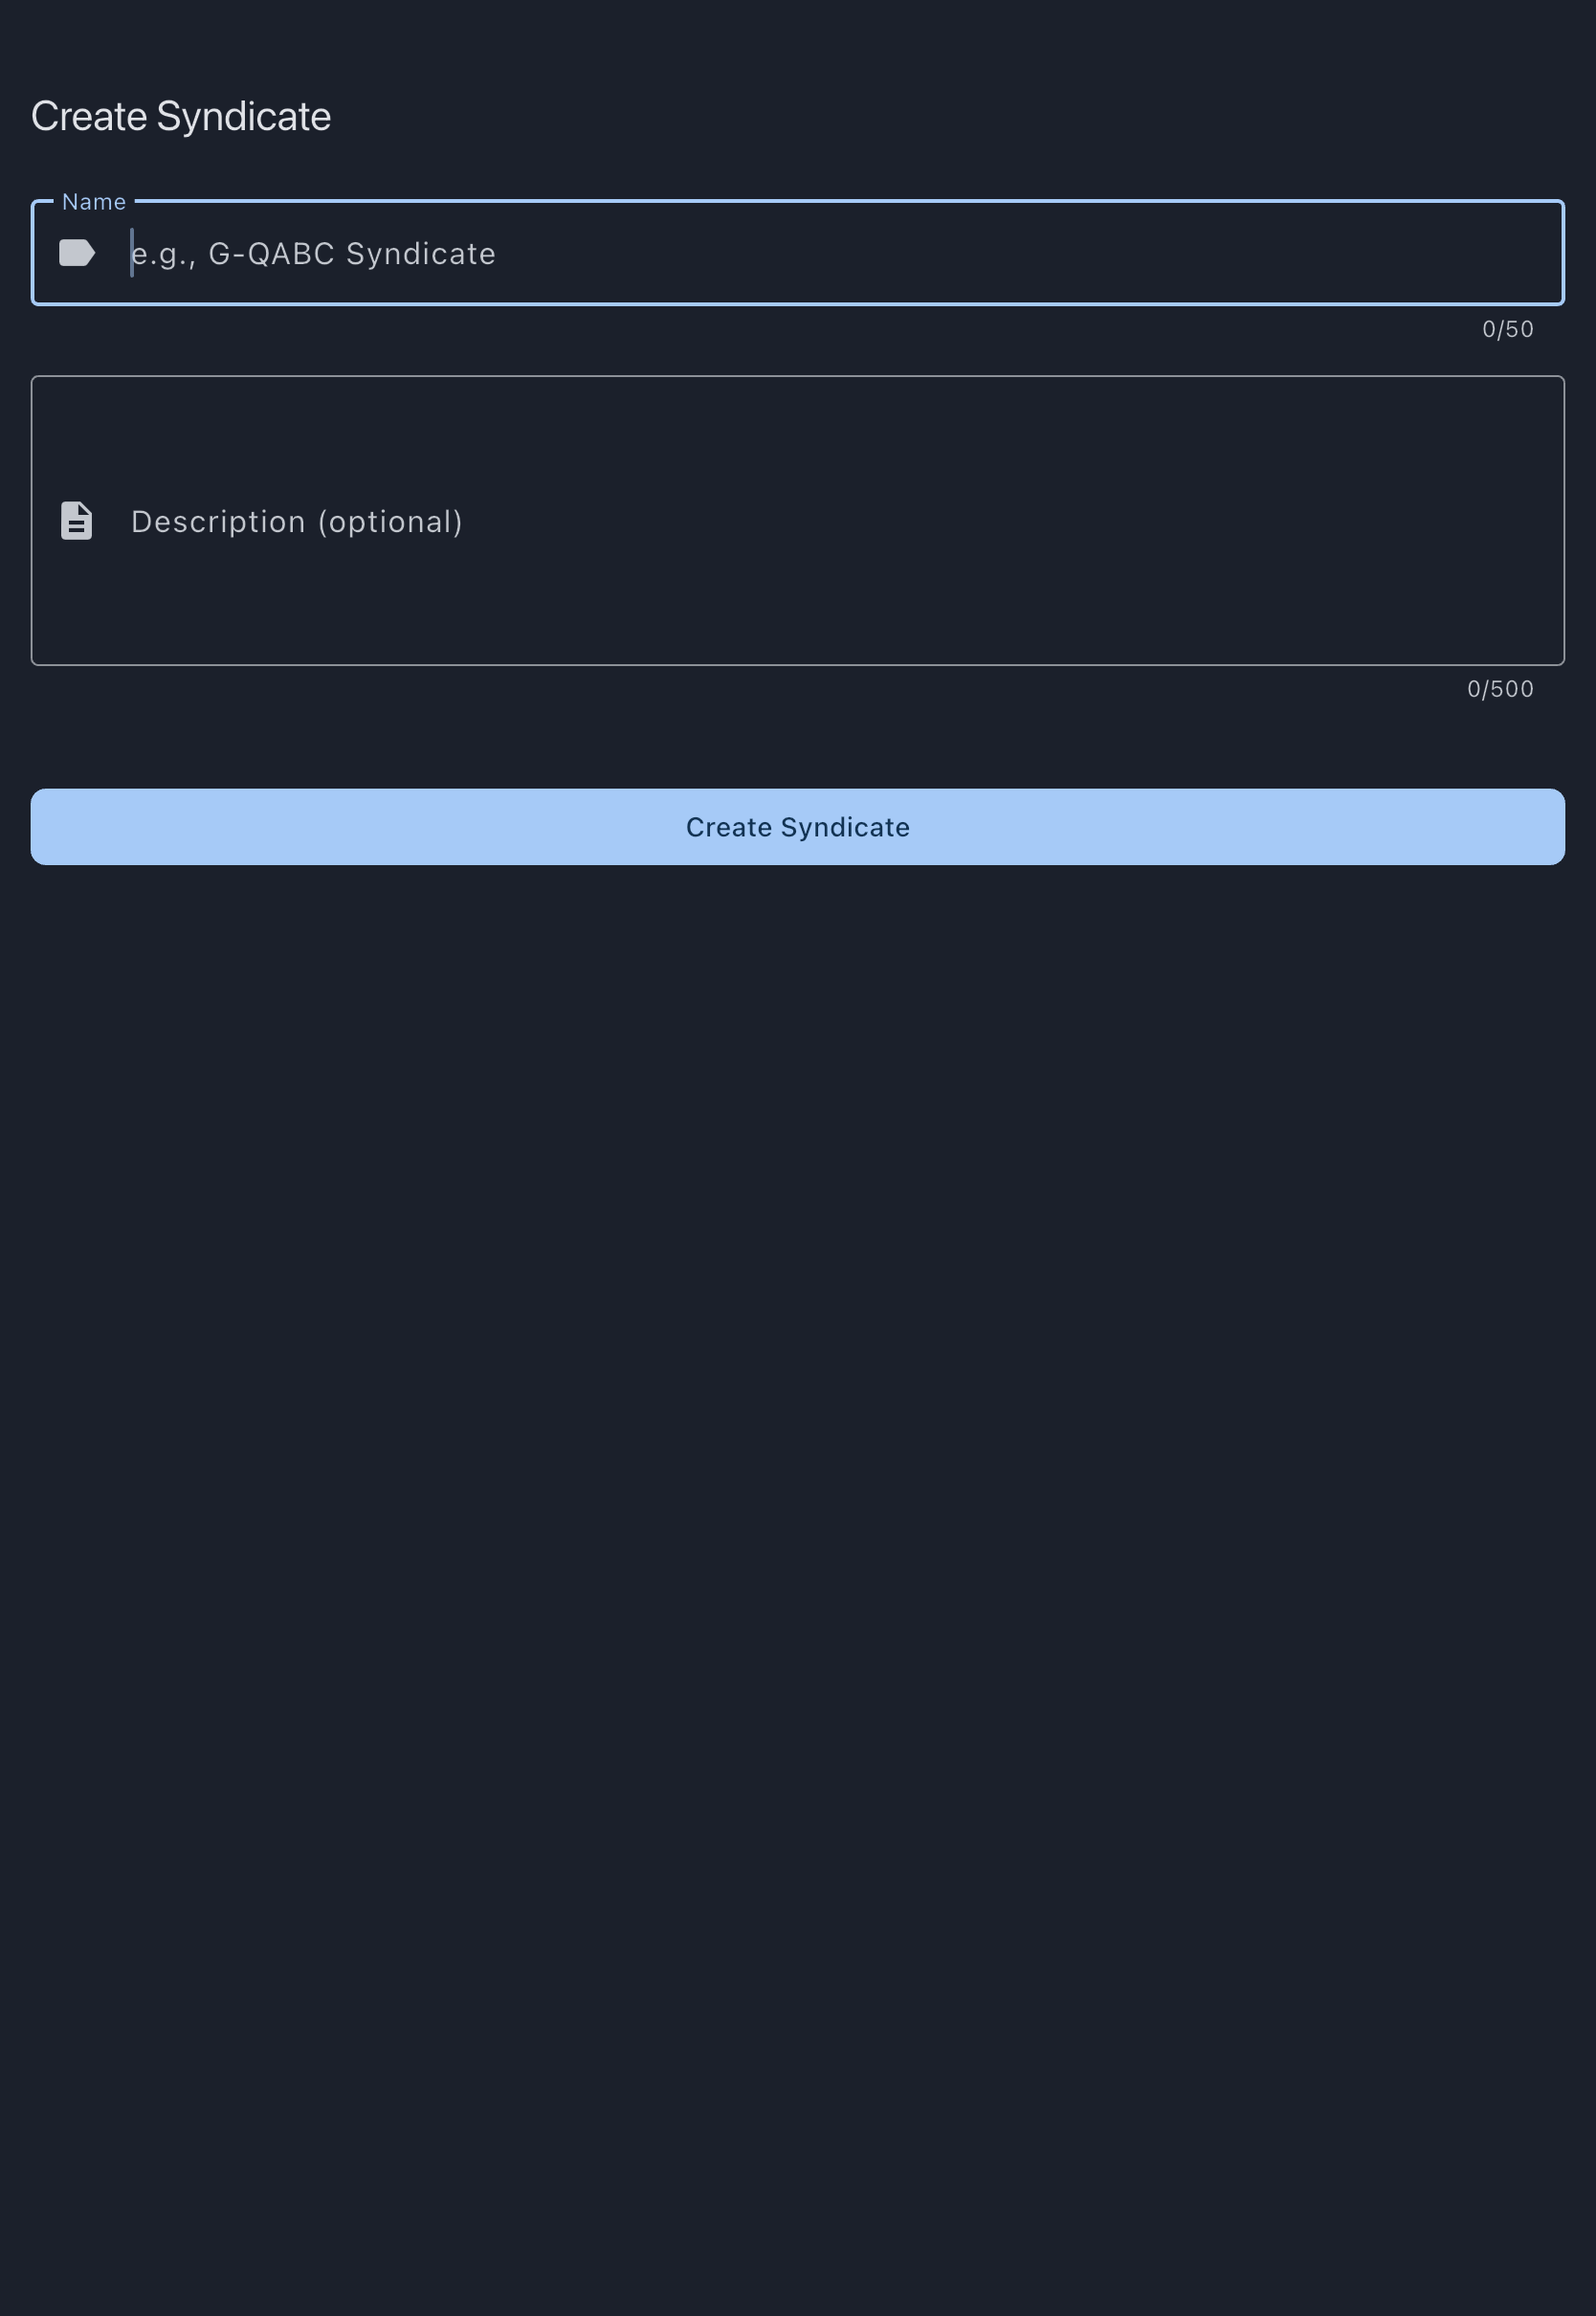
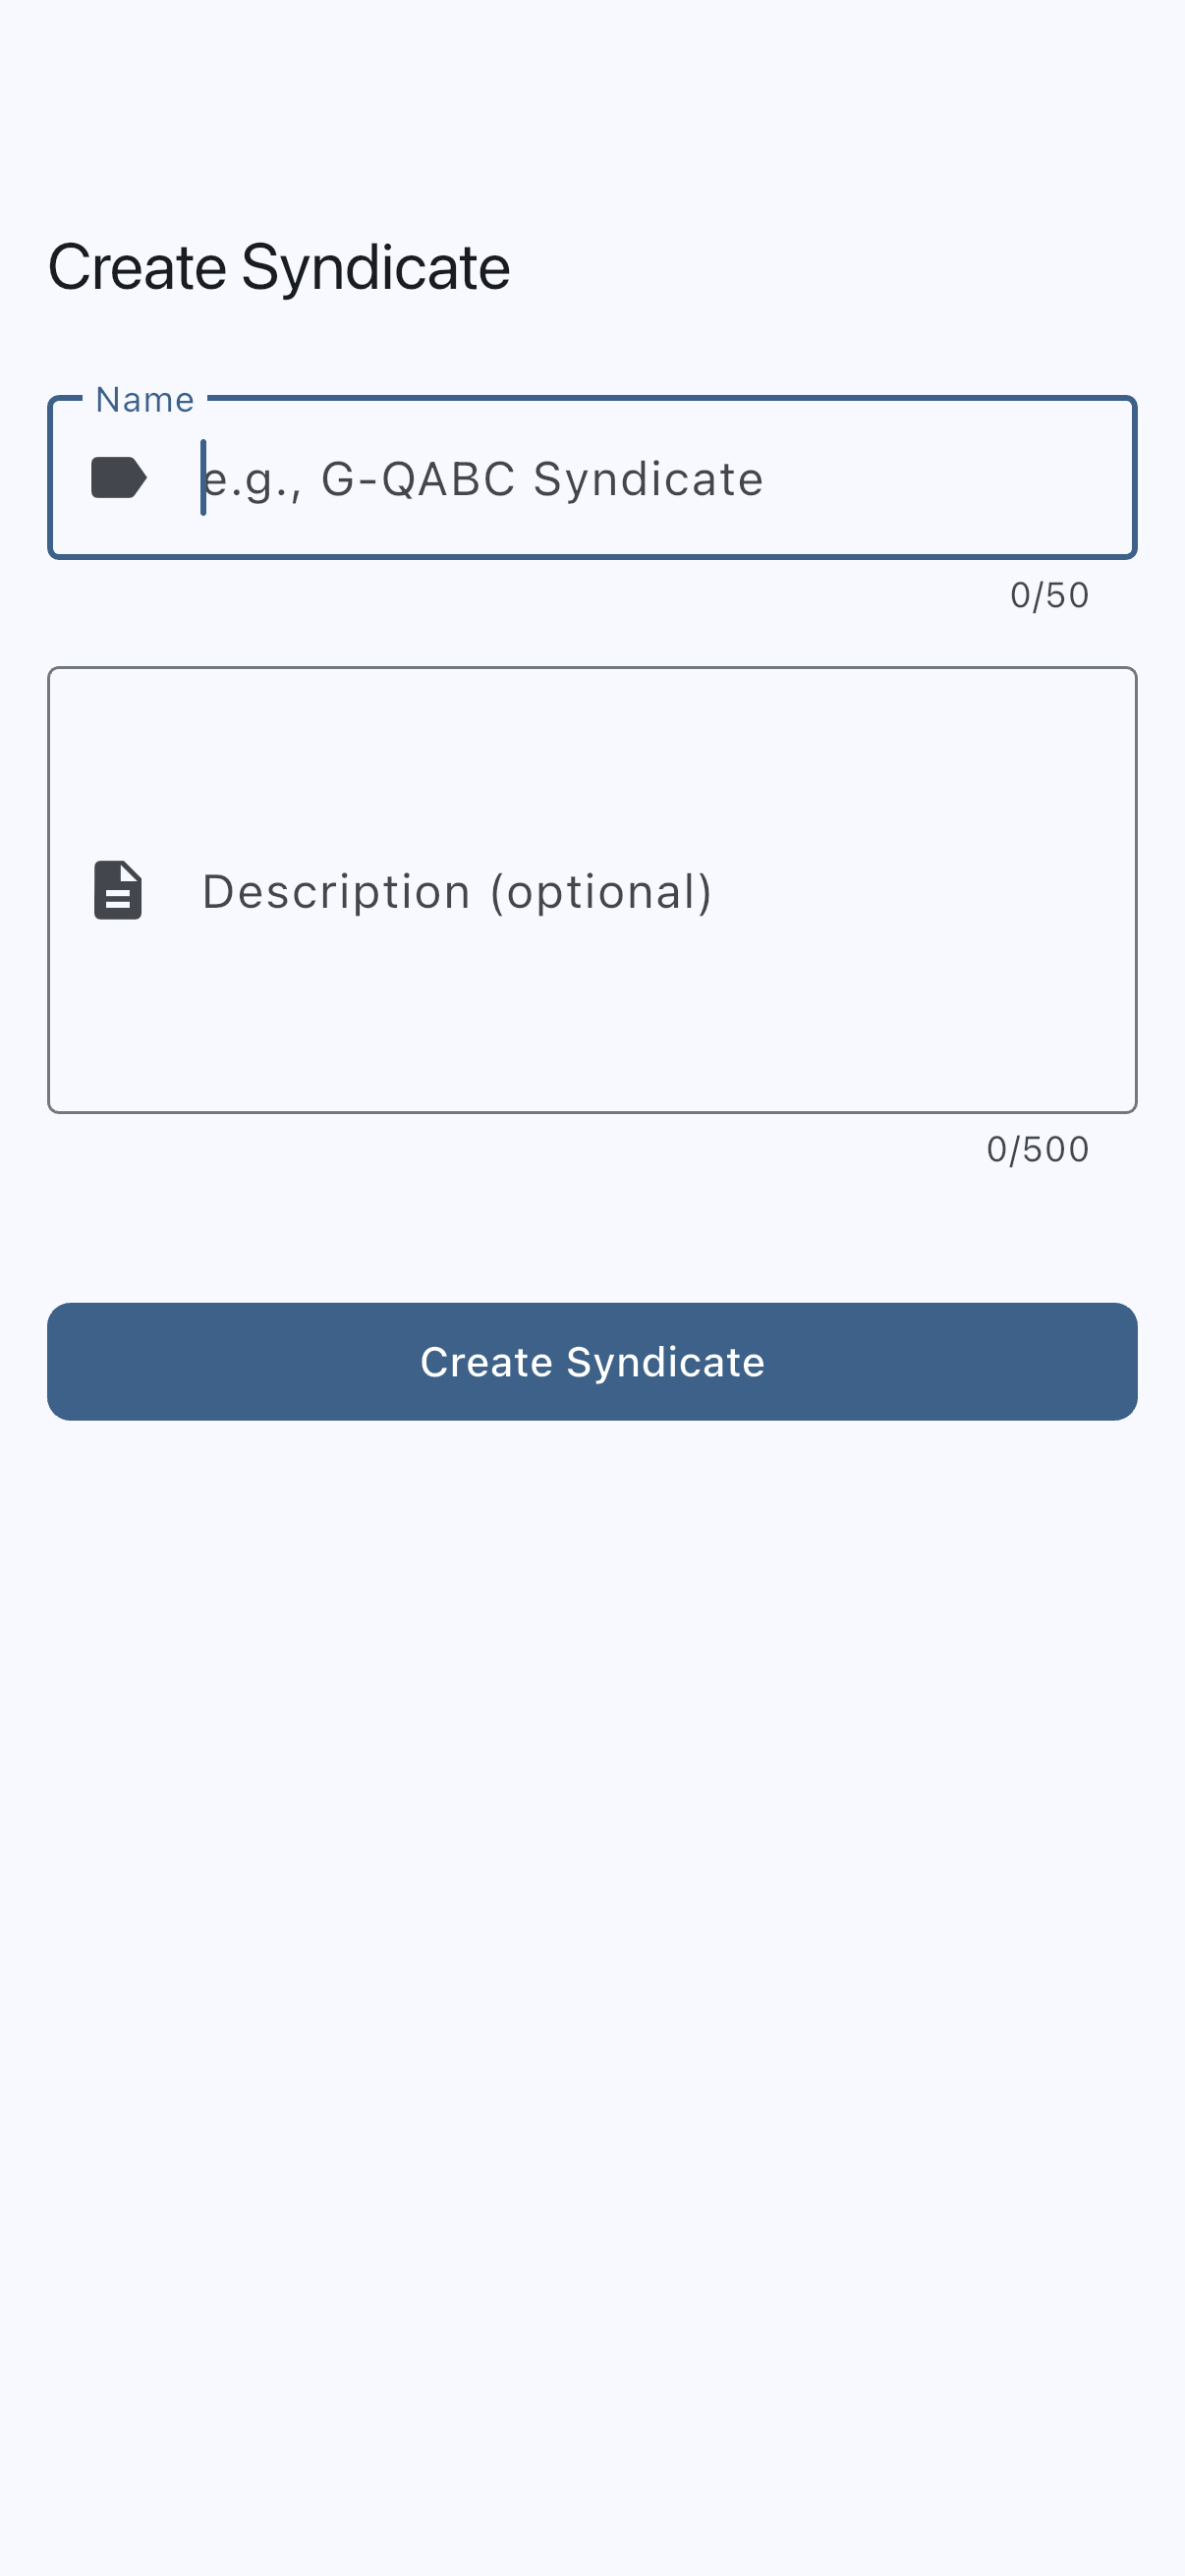
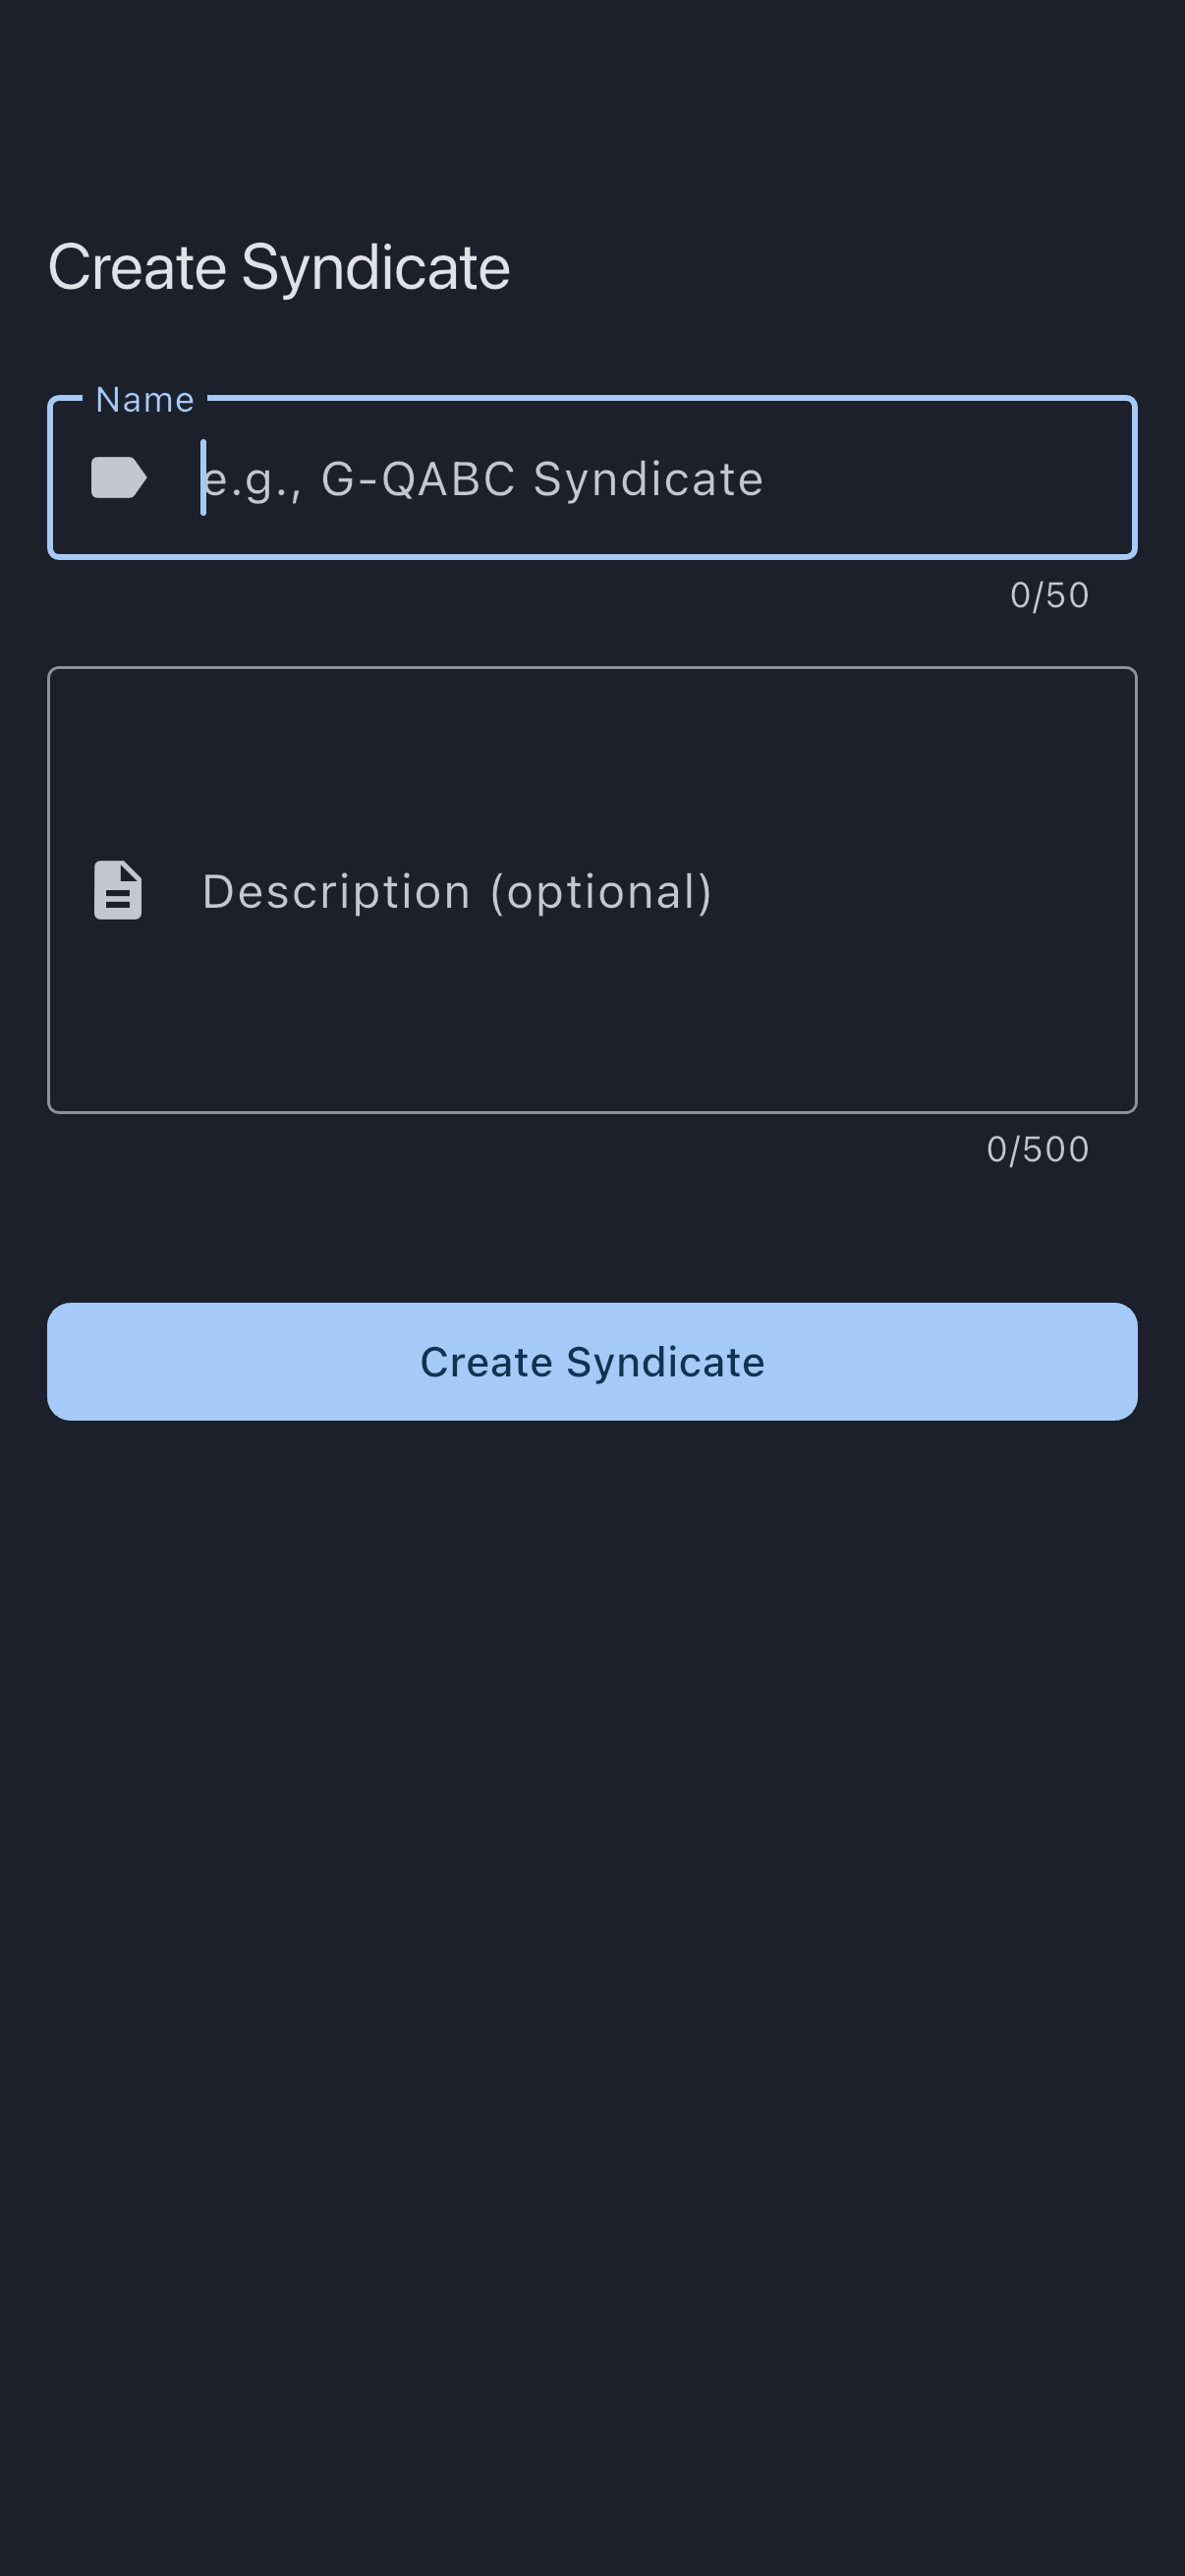
On the Create Syndicate screen:
- Name: what your group is called.
- Description (optional): a line for your members.
Tap Create Syndicate. Syndik8 confirms with Syndicate created successfully and opens your new syndicate.
As in the wizard, you become the new syndicate’s first admin, and it starts with a single rate band called Standard Member.
Step 2: Add your first aircraft
Section titled “Step 2: Add your first aircraft”Open your new syndicate and go to the Assets tab. With nothing in it yet, the tab reads No Assets over the prompt Add your first aircraft to get started, with an Add Aircraft button beneath. Tap that. (The + button in the corner that adds later aircraft only appears once the syndicate has one.)
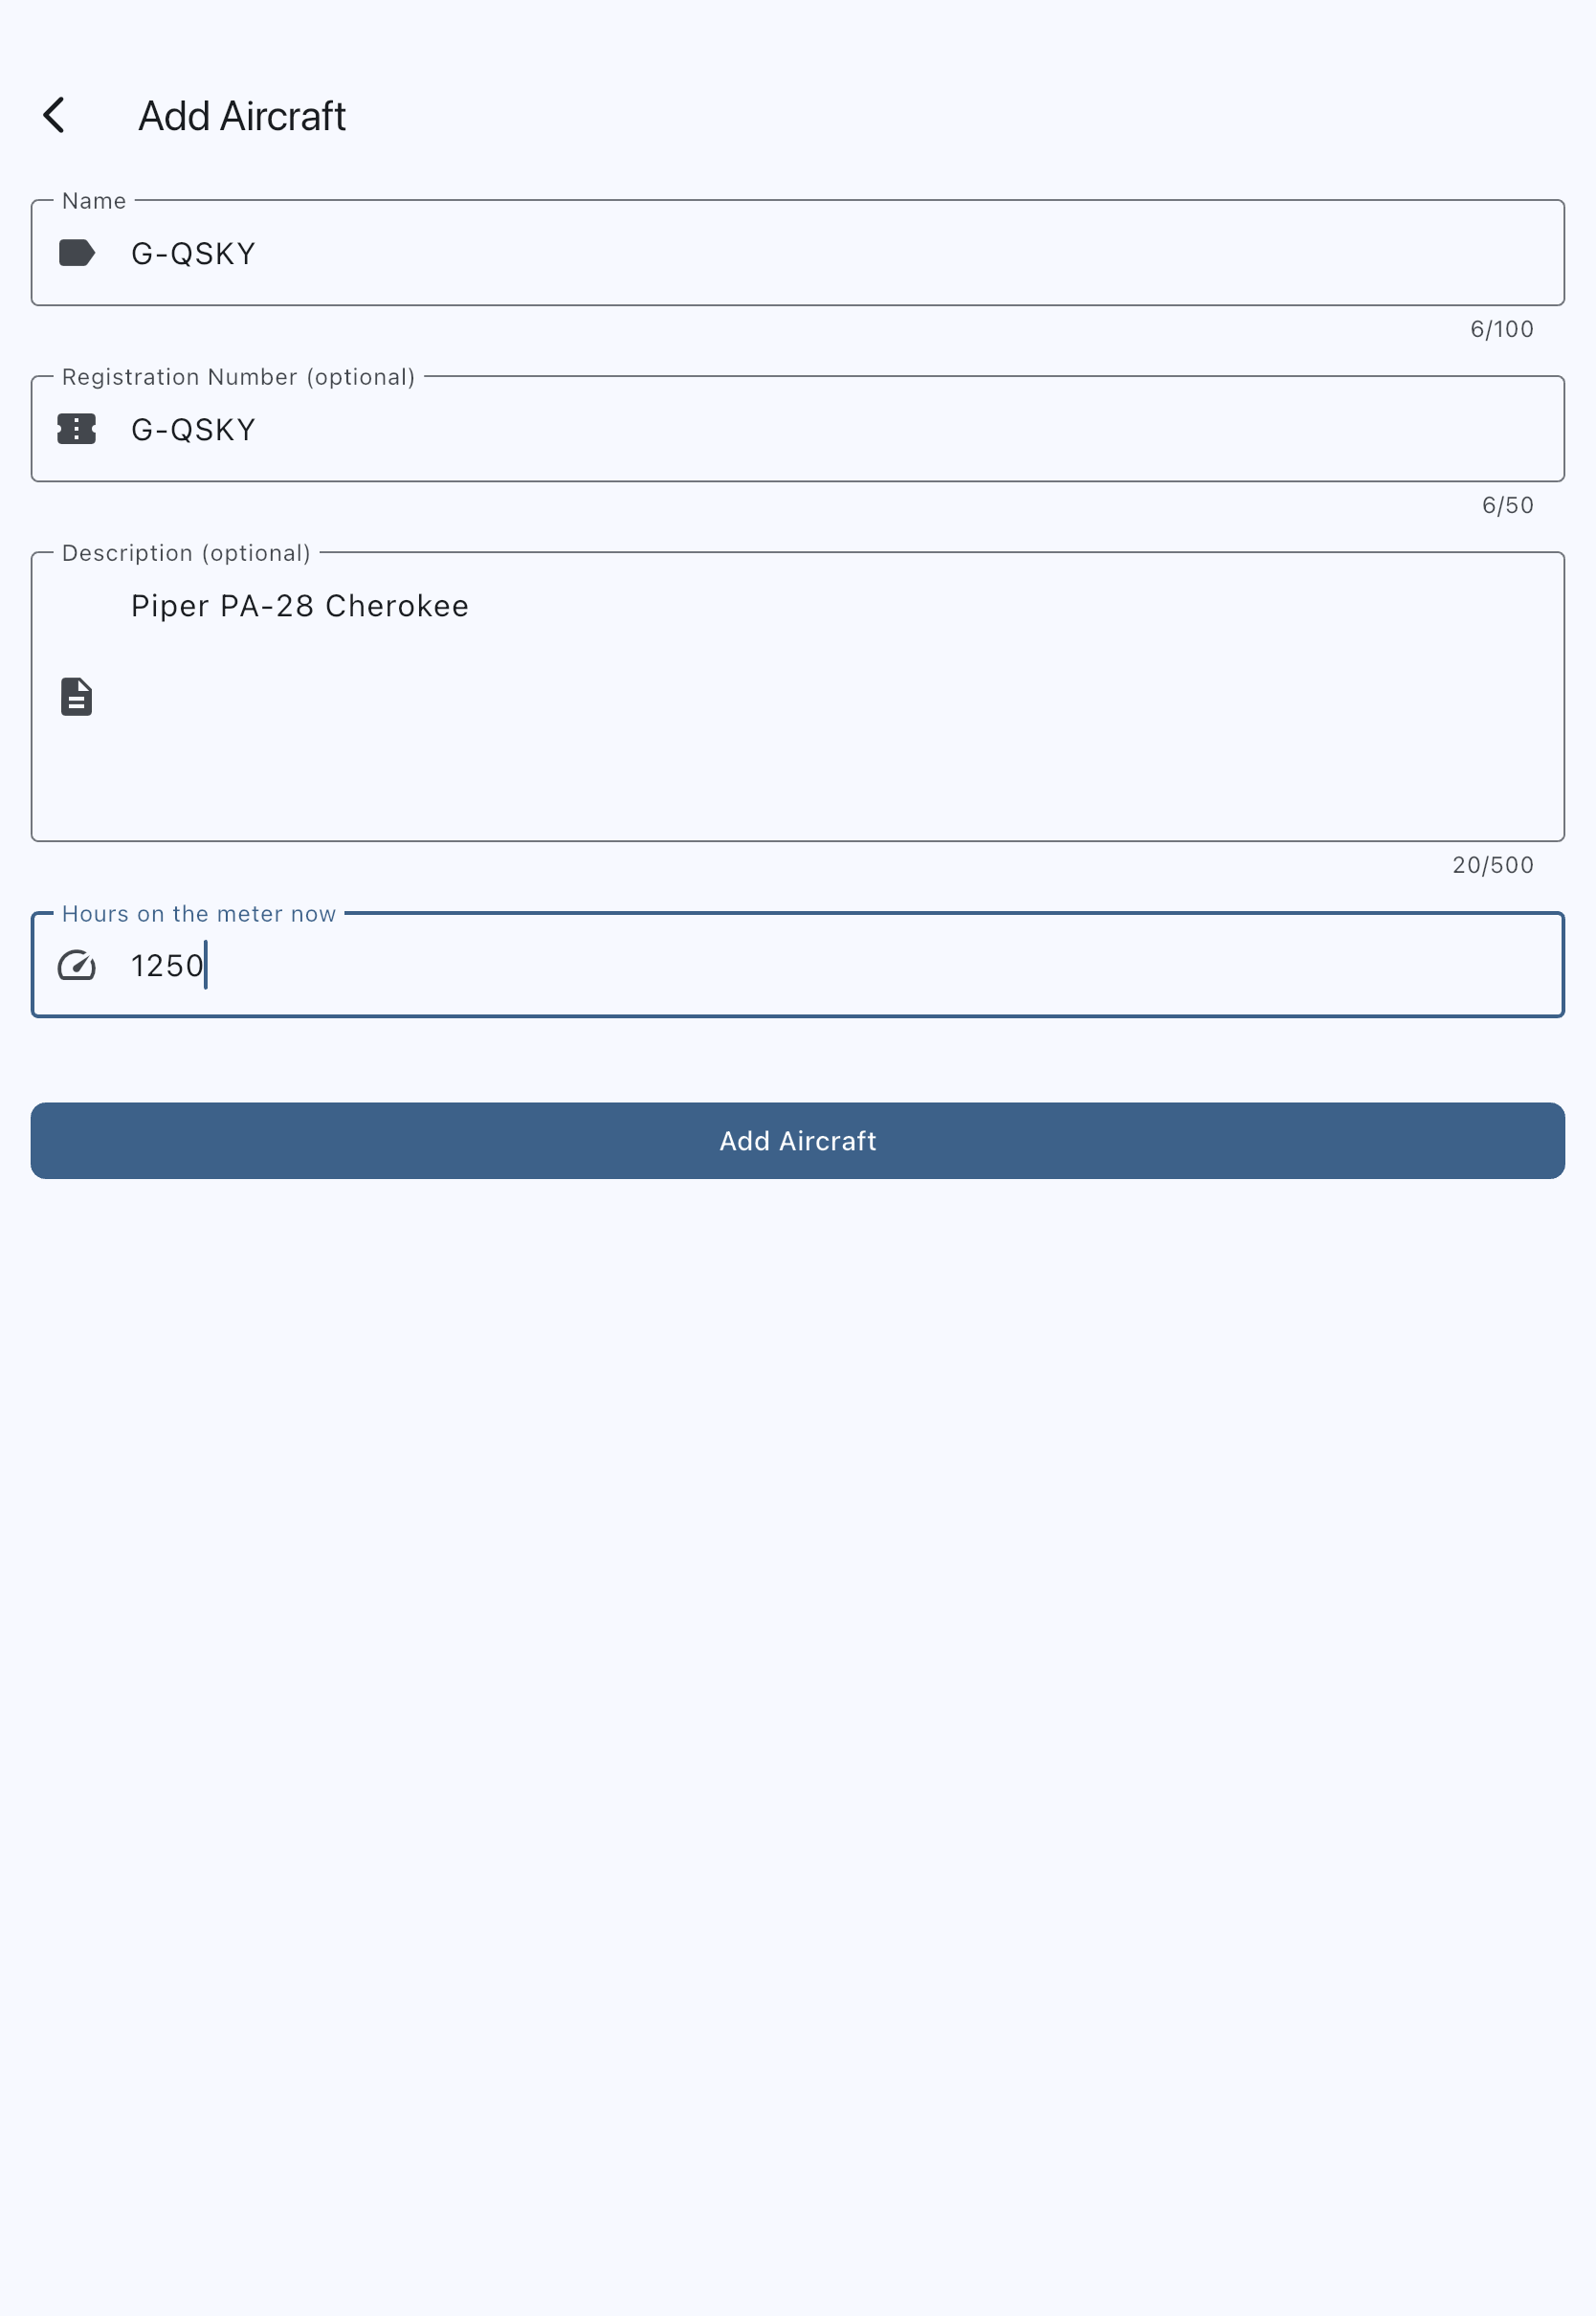
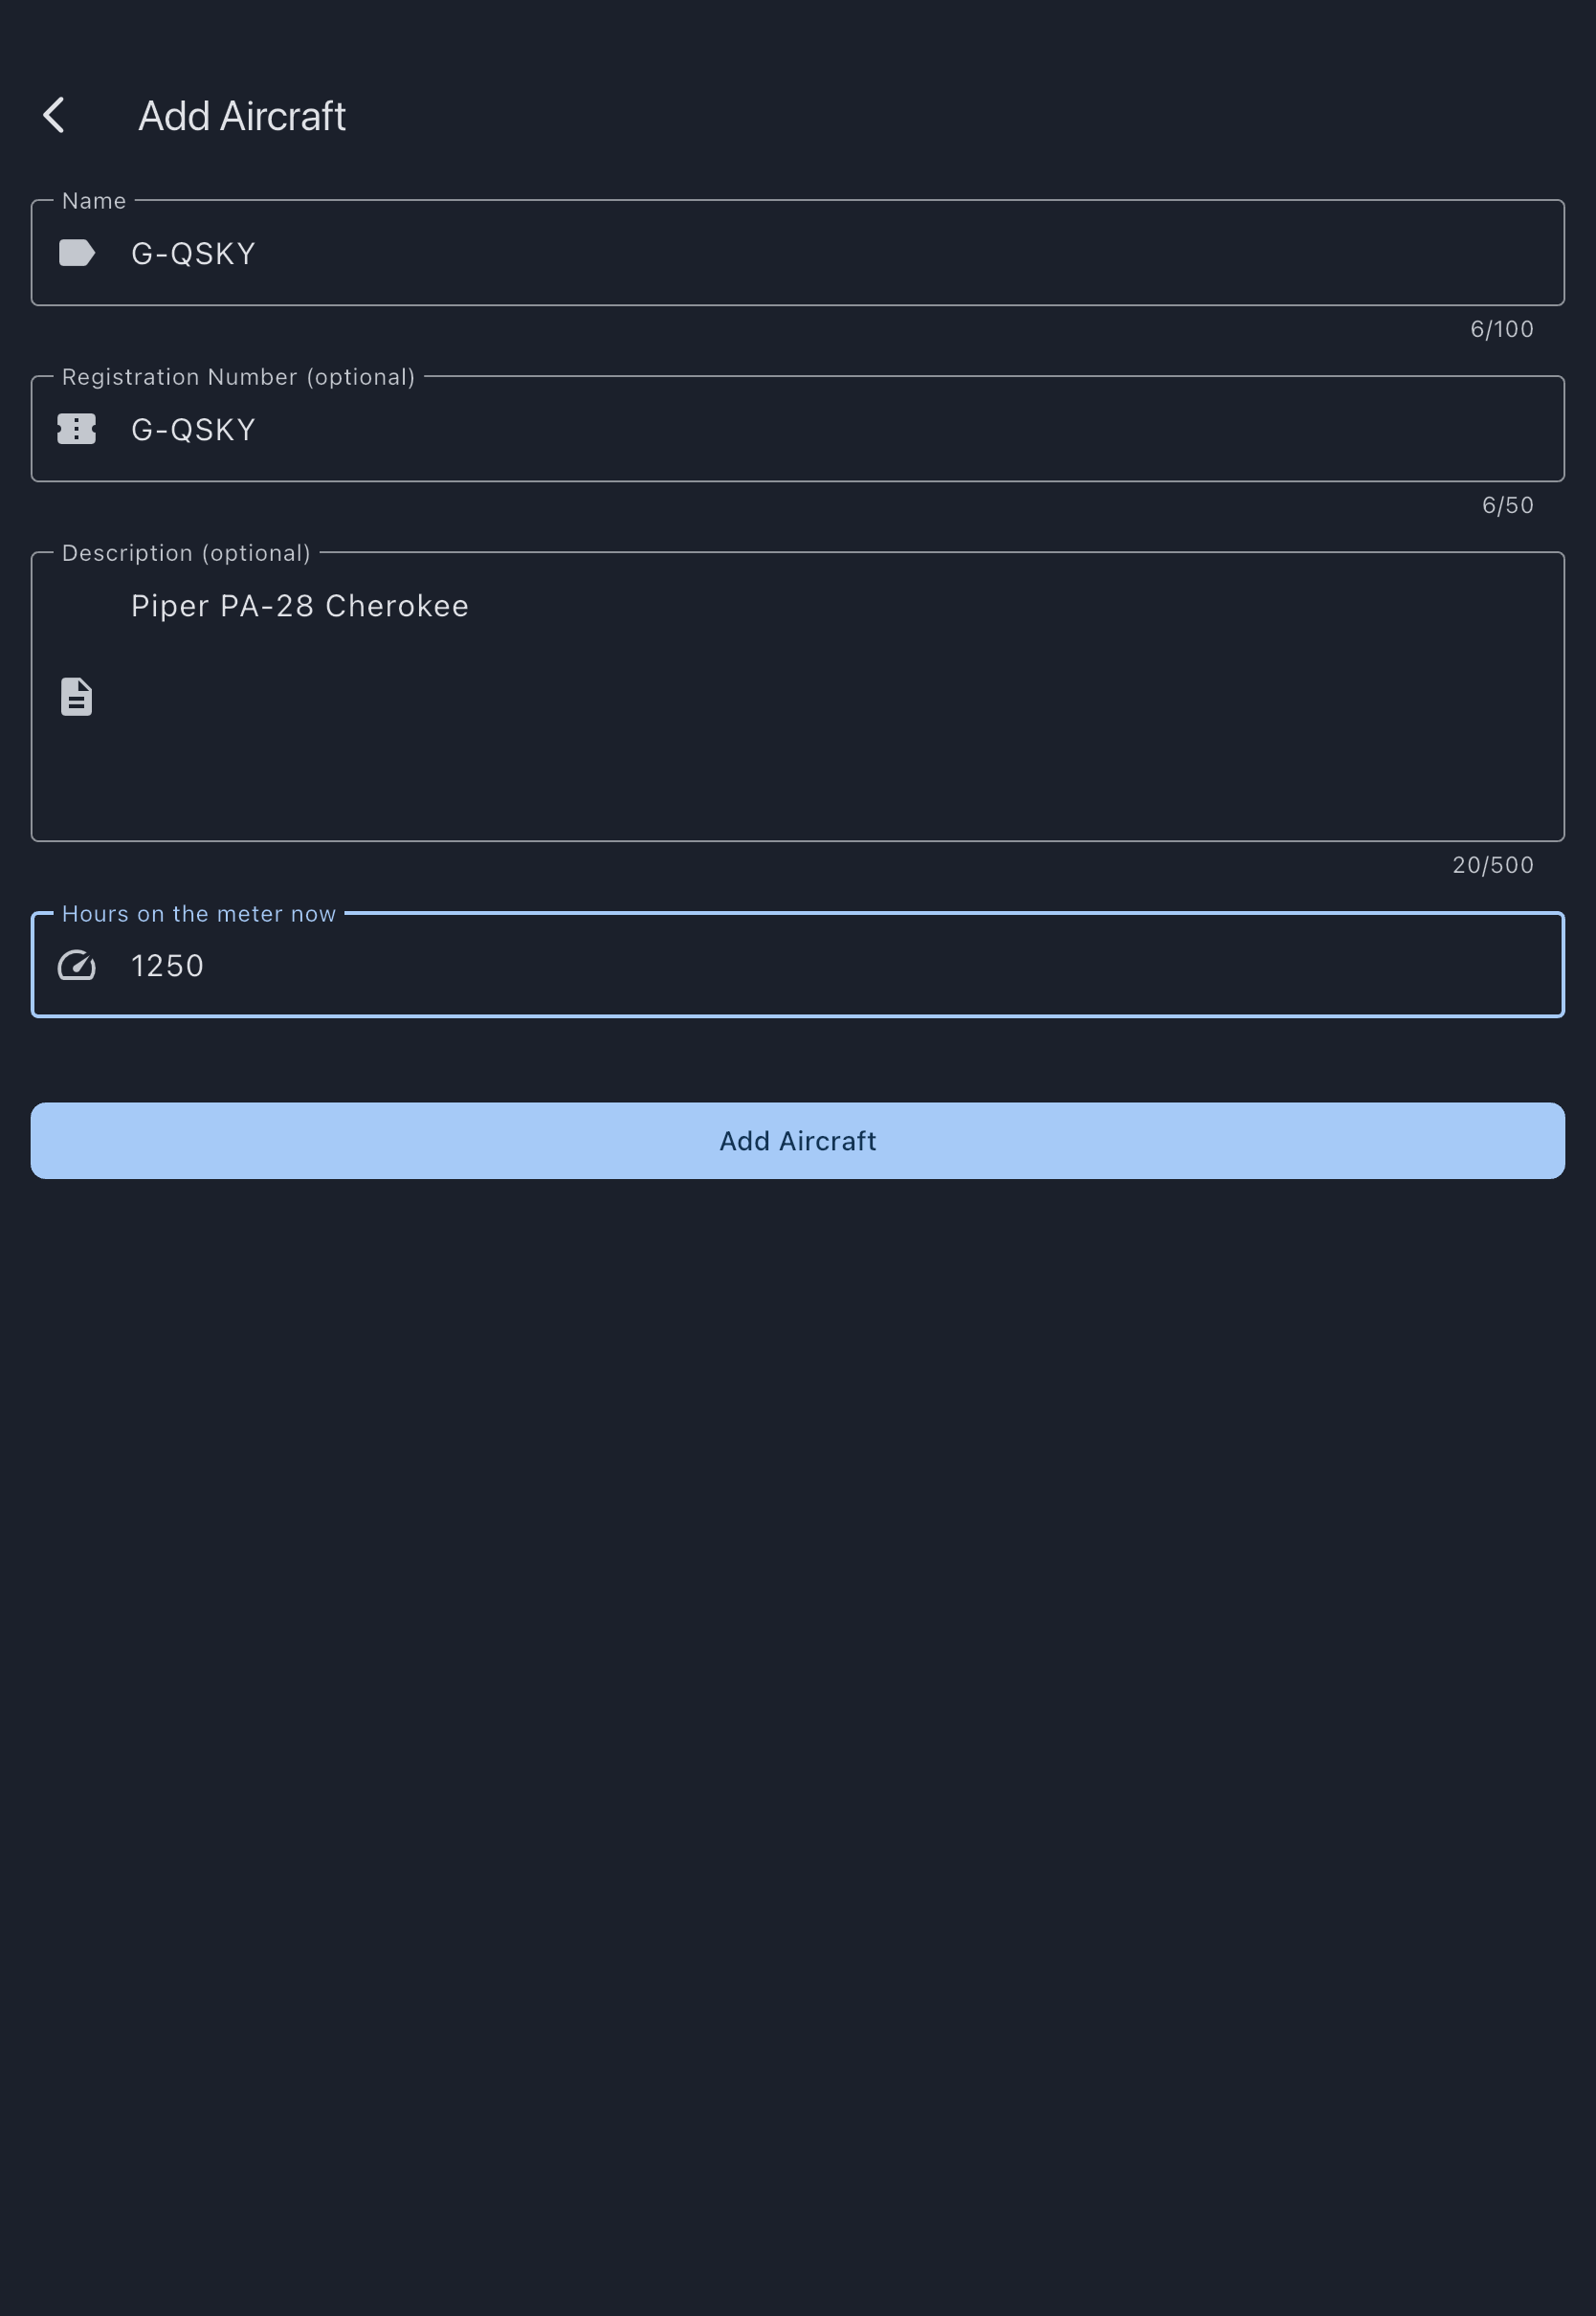
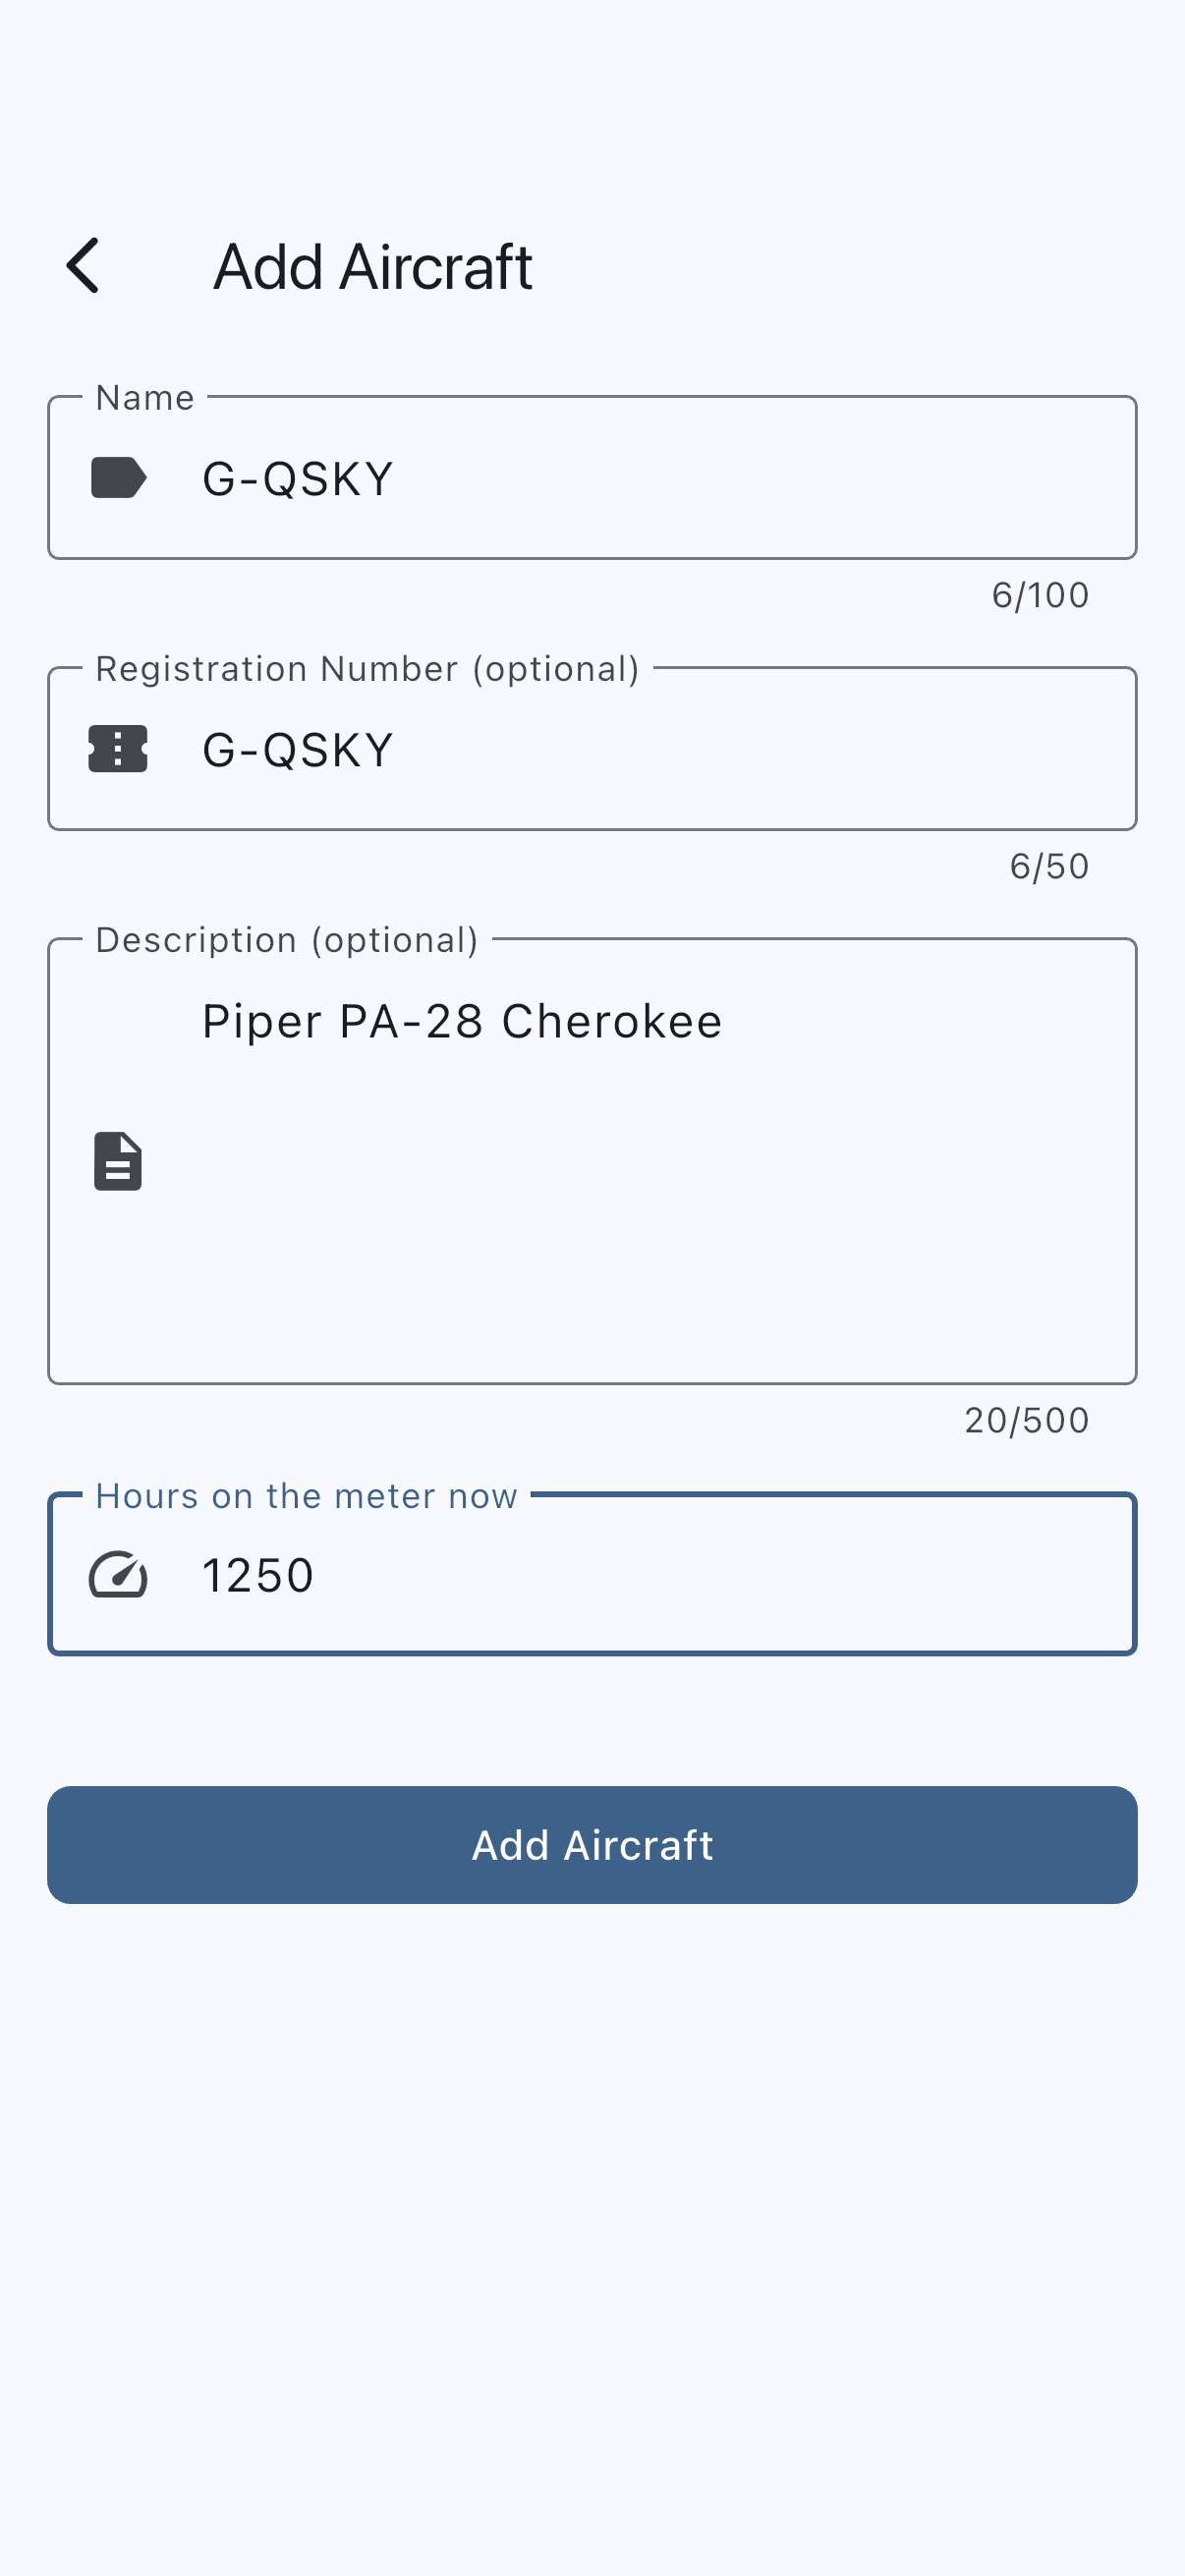
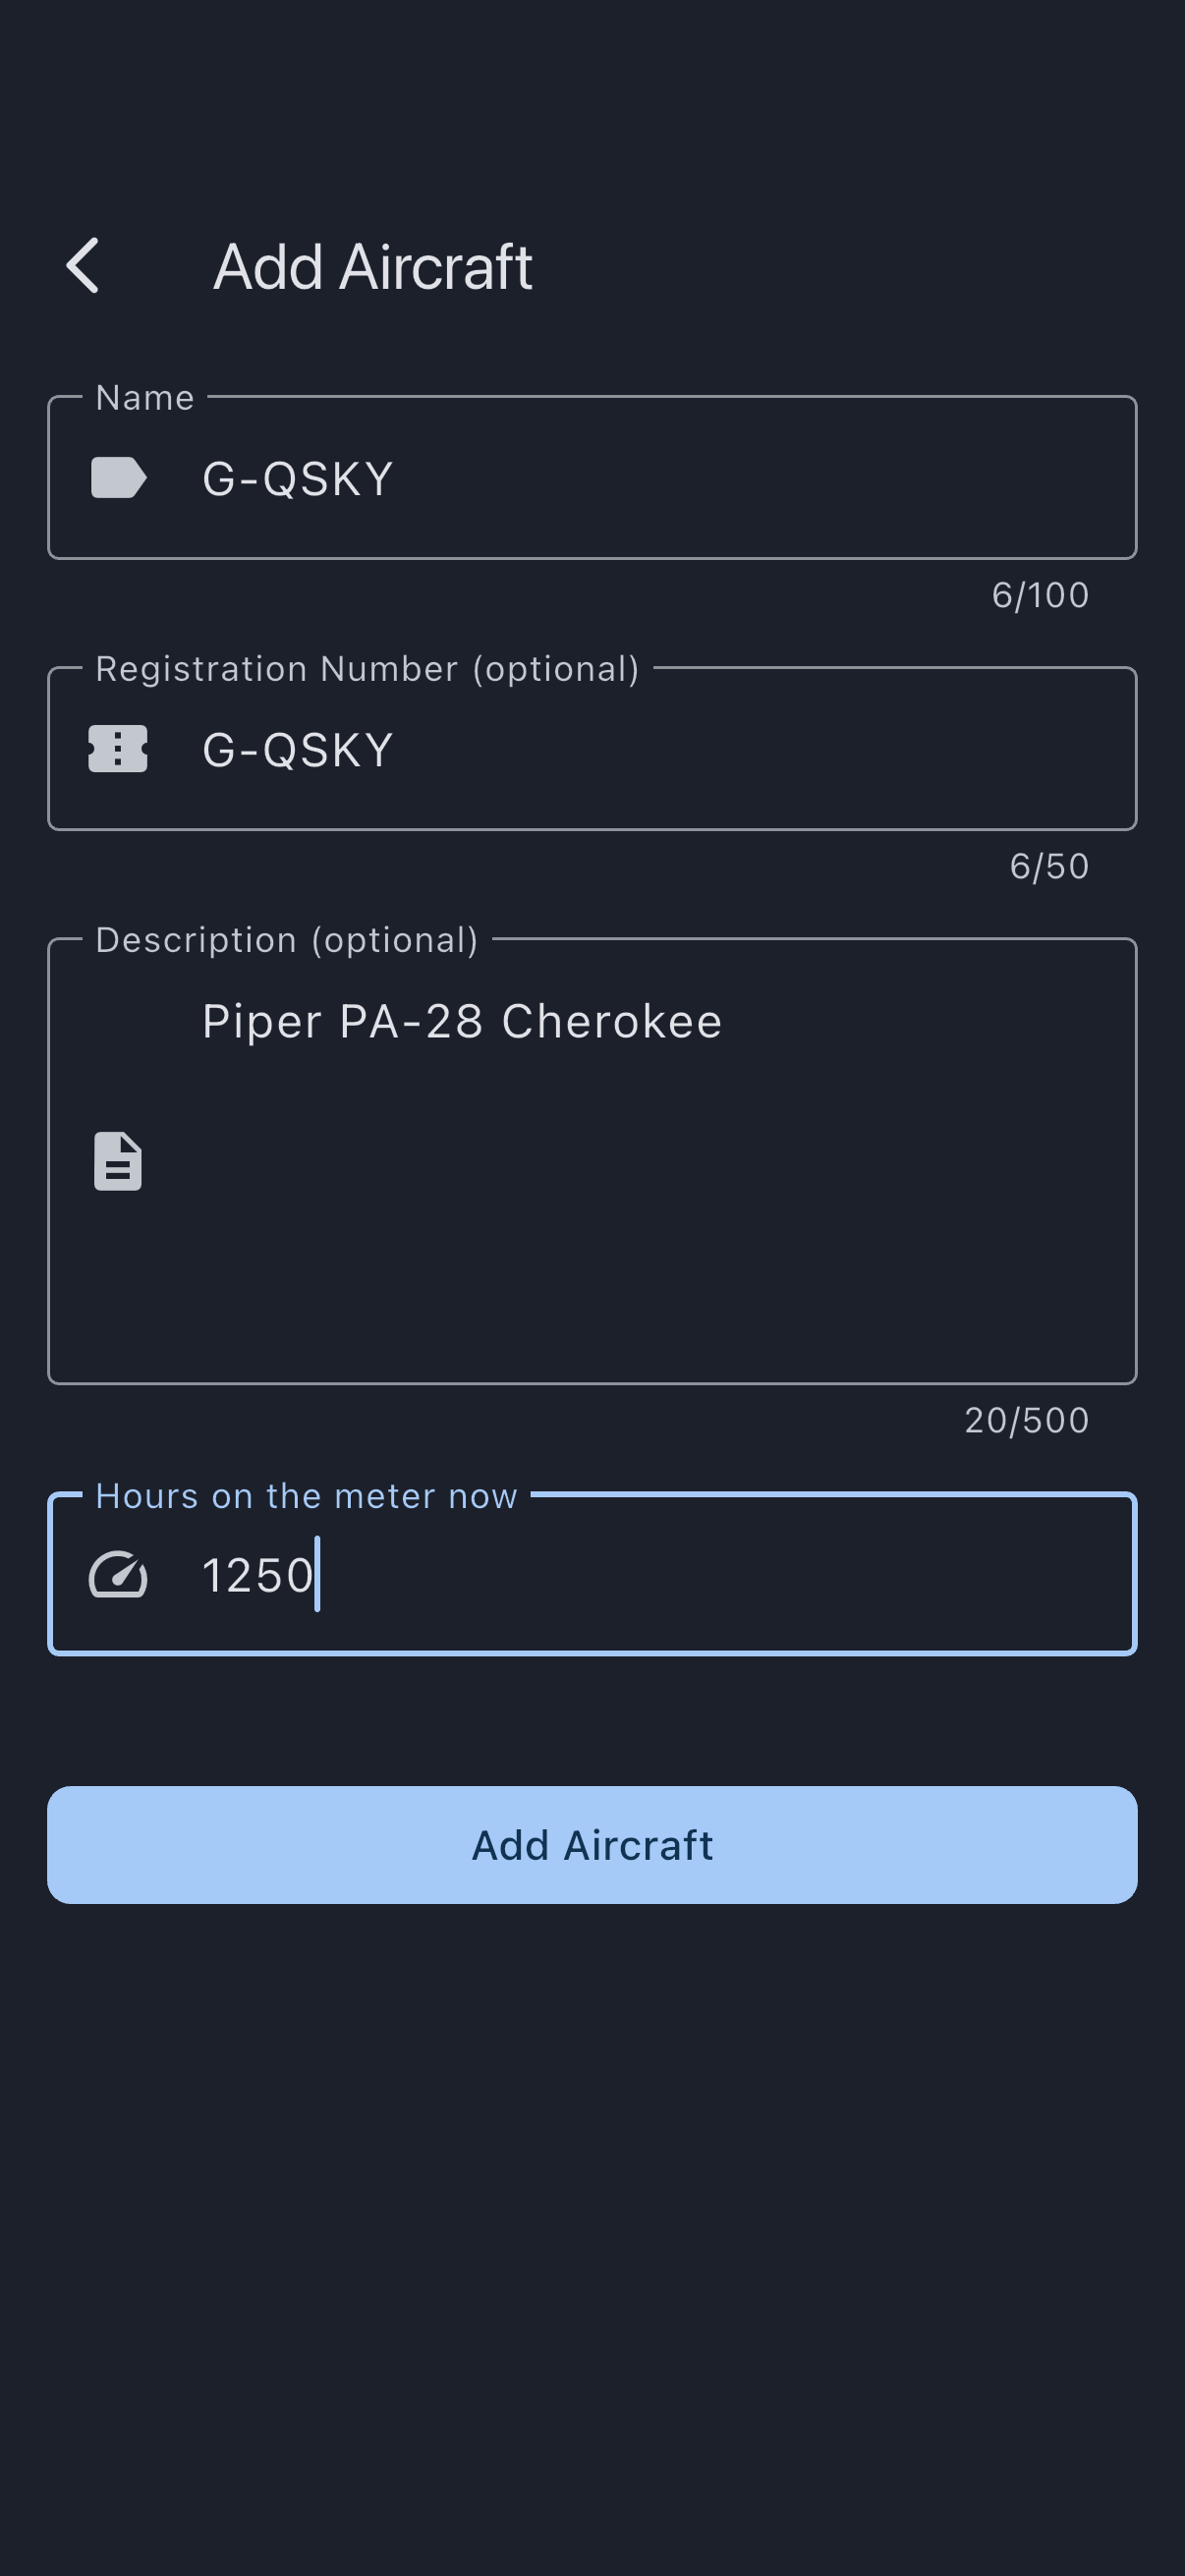
On the Add Aircraft screen:
- Name: the aircraft’s tail number. It’s what the rest of the app calls the aircraft by, on the calendar, in bookings and on every charge.
- Registration Number (optional): the full registration.
- Description (optional): the make and model, or anything else useful to your members.
- Hours on the meter now: today’s meter reading. Syndik8 uses it as the baseline for usage-based maintenance.
There’s no photo control here. A photo is added afterwards, from the Edit Asset pencil on the aircraft’s own screen — see Upload an asset photo.
Tap Add Aircraft to save it.
You won’t see a Home Airfield field for this first aircraft. A syndicate’s first aircraft uses the syndicate’s own home airfield, which you set with your rates in the next step. That field only appears once you add a second aircraft that might want a different base. (The setup wizard asks for the home airfield on its aircraft step instead, but it stores the same syndicate-wide value, so both routes end up in the same place.)
Saving opens the new aircraft’s own screen. Go back and it’s listed under the Assets tab, whose label now reads Asset (singular) because you have exactly one.
Step 3: Set your rates
Section titled “Step 3: Set your rates”Rates live on the Admin tab. Open Admin and tap Asset rates.
Because you have a single aircraft, the first section is headed Billing (it becomes Default Billing once a second aircraft joins). Enter:
- Usage Rate: the amount a member pays per flying hour. This is the one figure the screen insists on.
- Shortfall Rate: an optional, usually lower, rate charged on unflown hours when a member misses a minimum. Leave it blank until you know you want one.
Under Minimum Usage, leave the Weekday Minimum and Weekend Minimum boxes empty to start. They arrive empty on a new syndicate, and an empty minimum is stored as zero, which is what turns the shortfall off.
To charge landing or touch-and-go fees, set your Home airfield (its ICAO code) and the fee amounts below it. The two fee boxes stay greyed out until an airfield is entered, because a fee only bills on a flight that arrives there. Those fees apply to flights that arrive back at that airfield; flights ending elsewhere aren’t charged them.
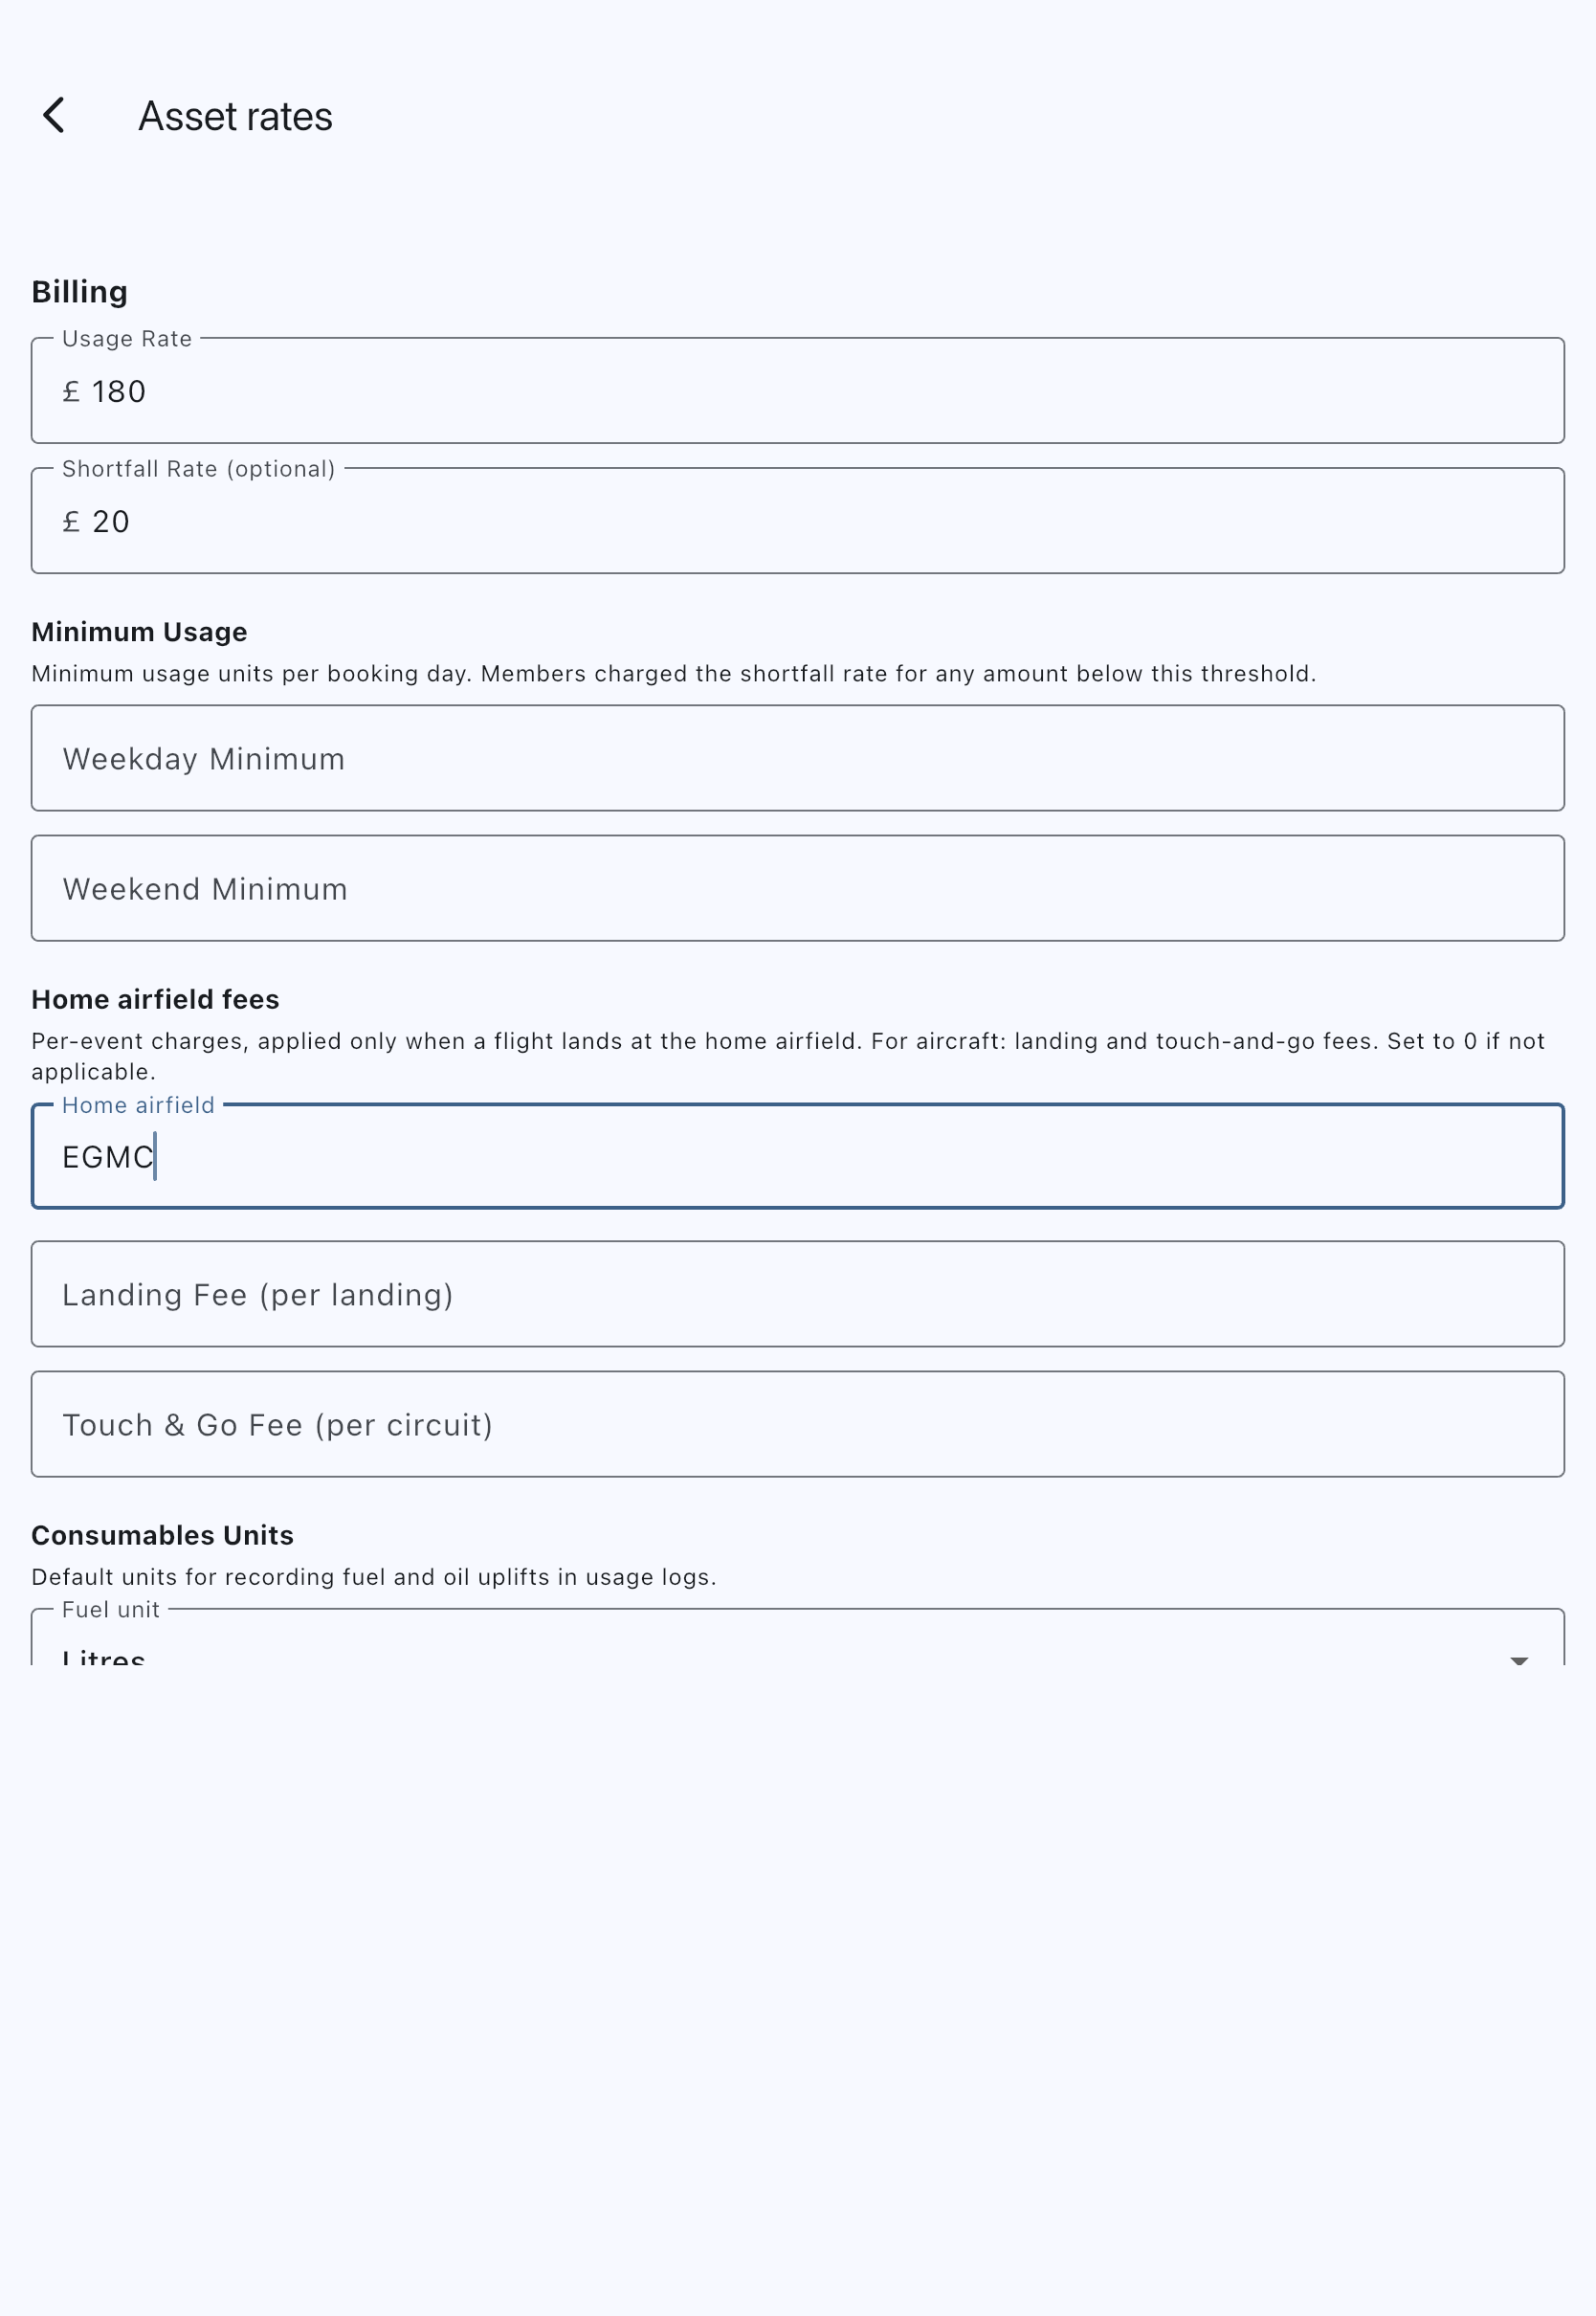
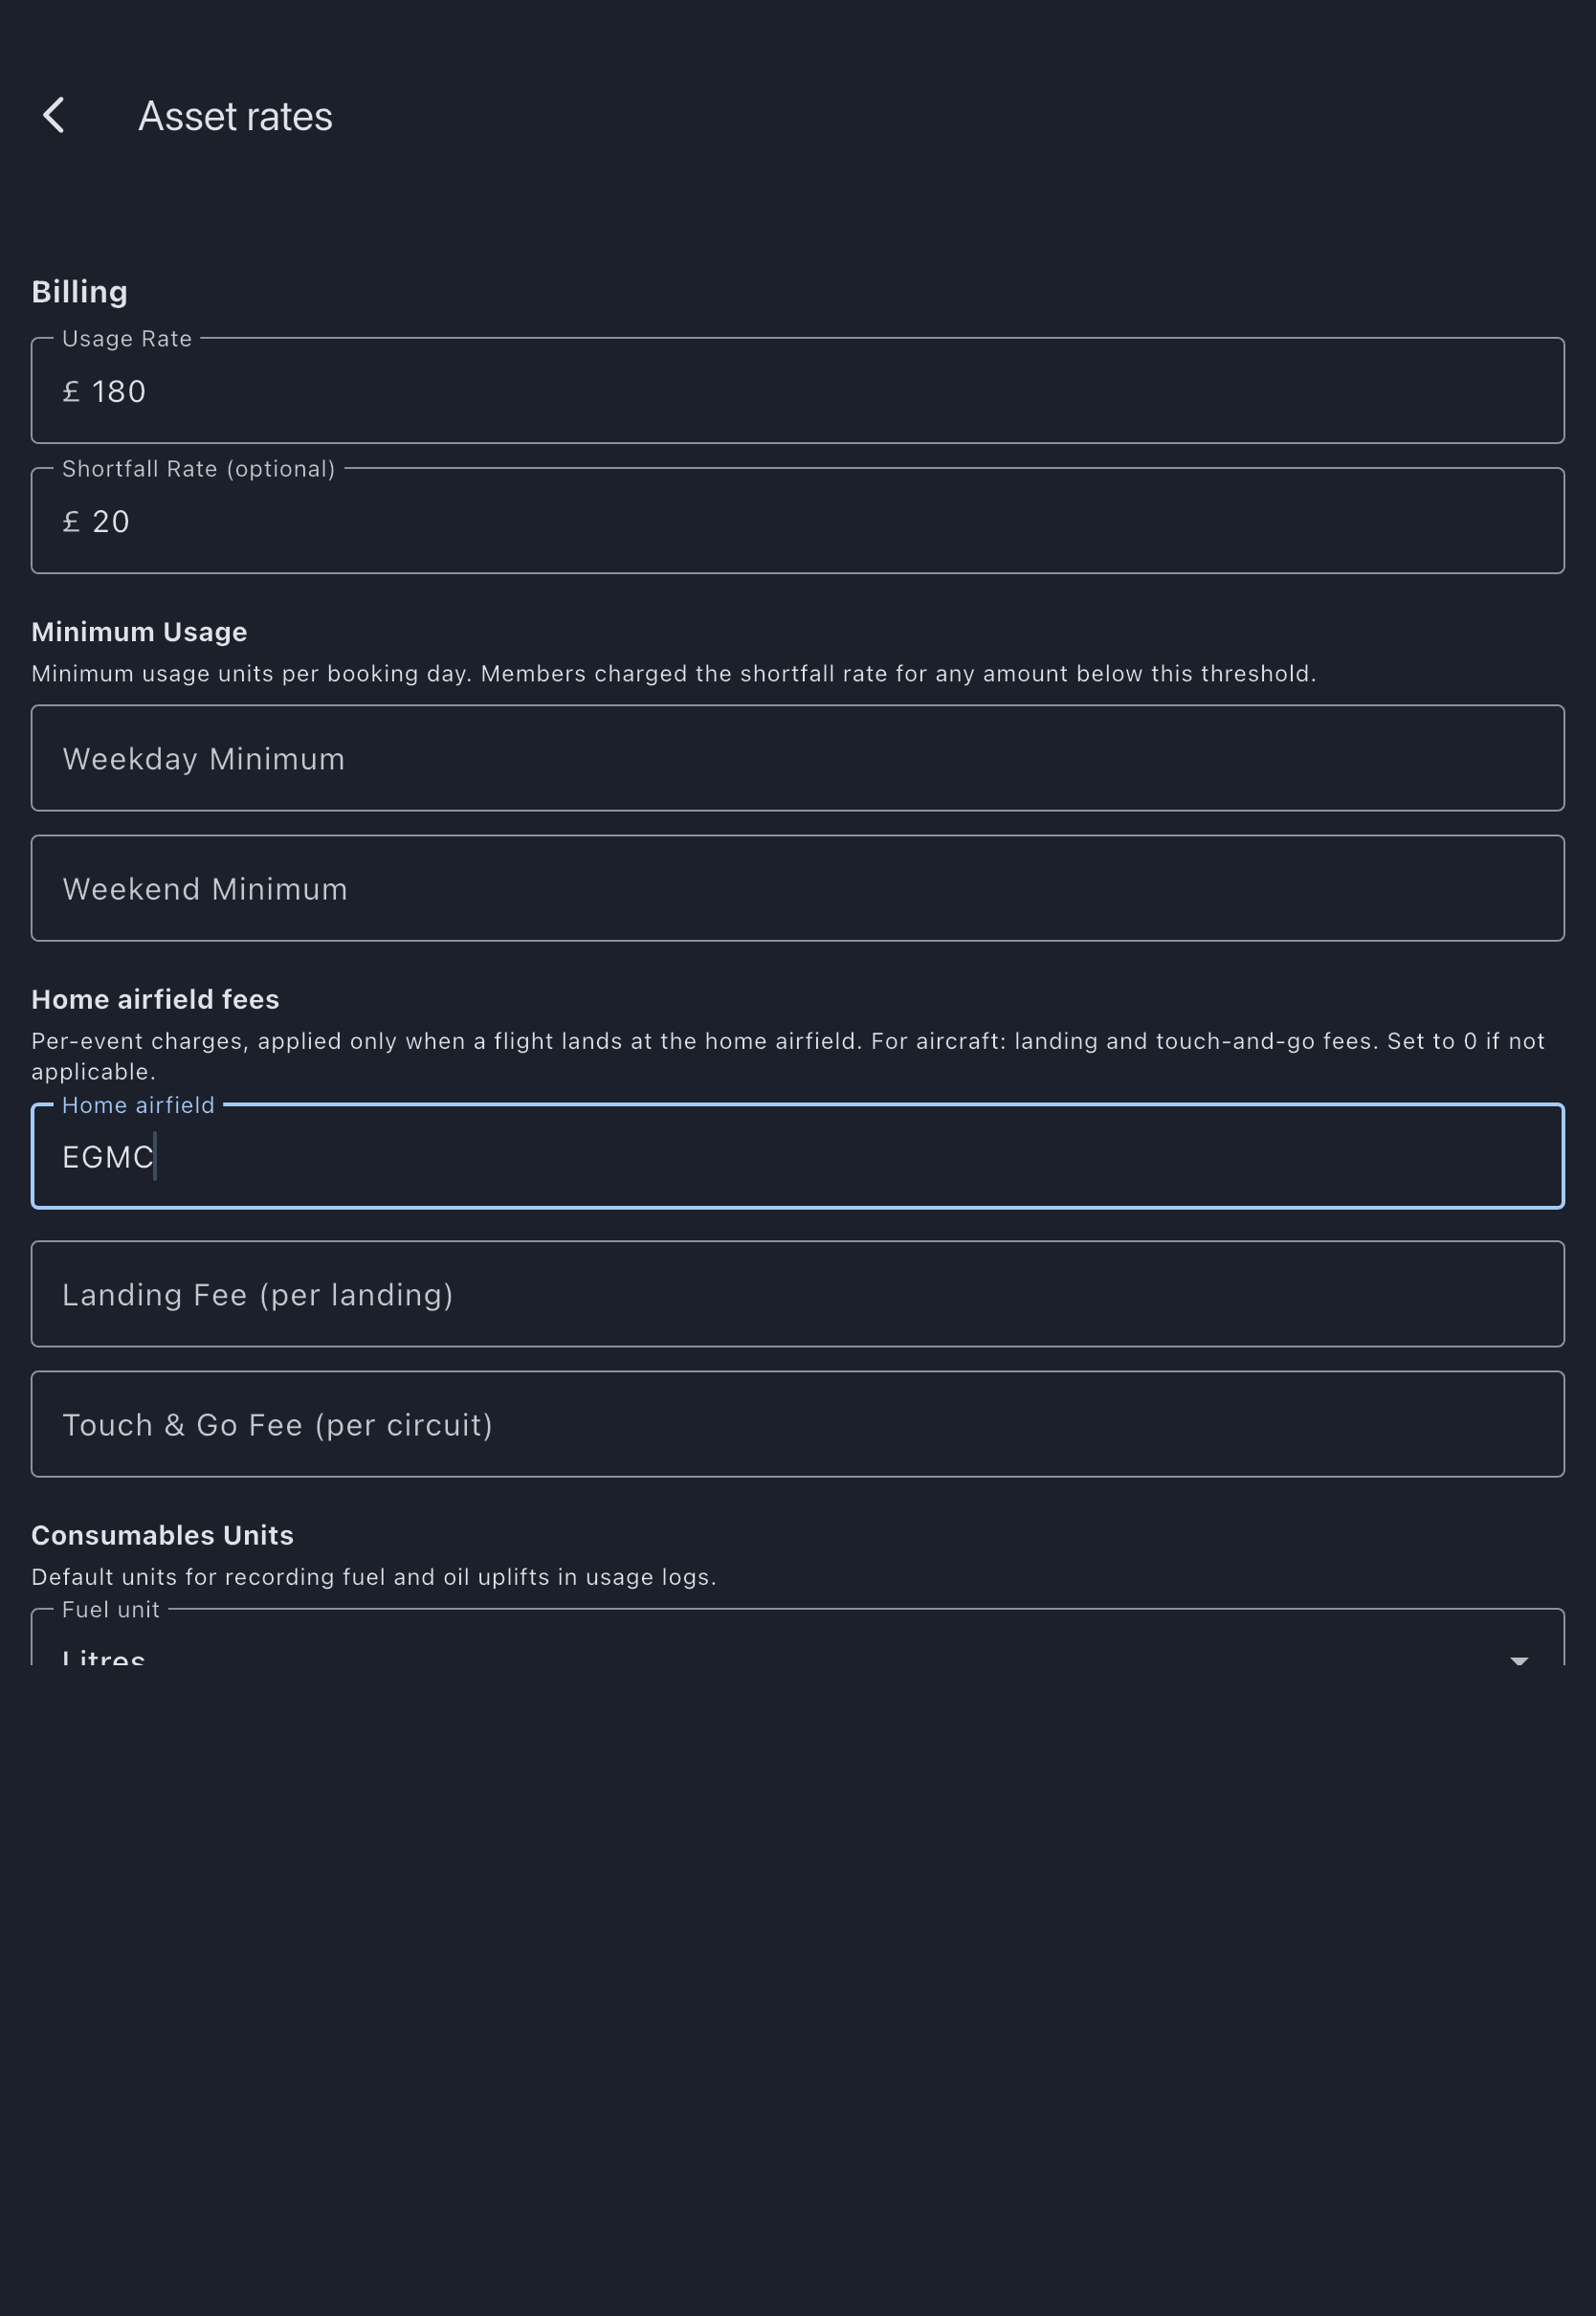
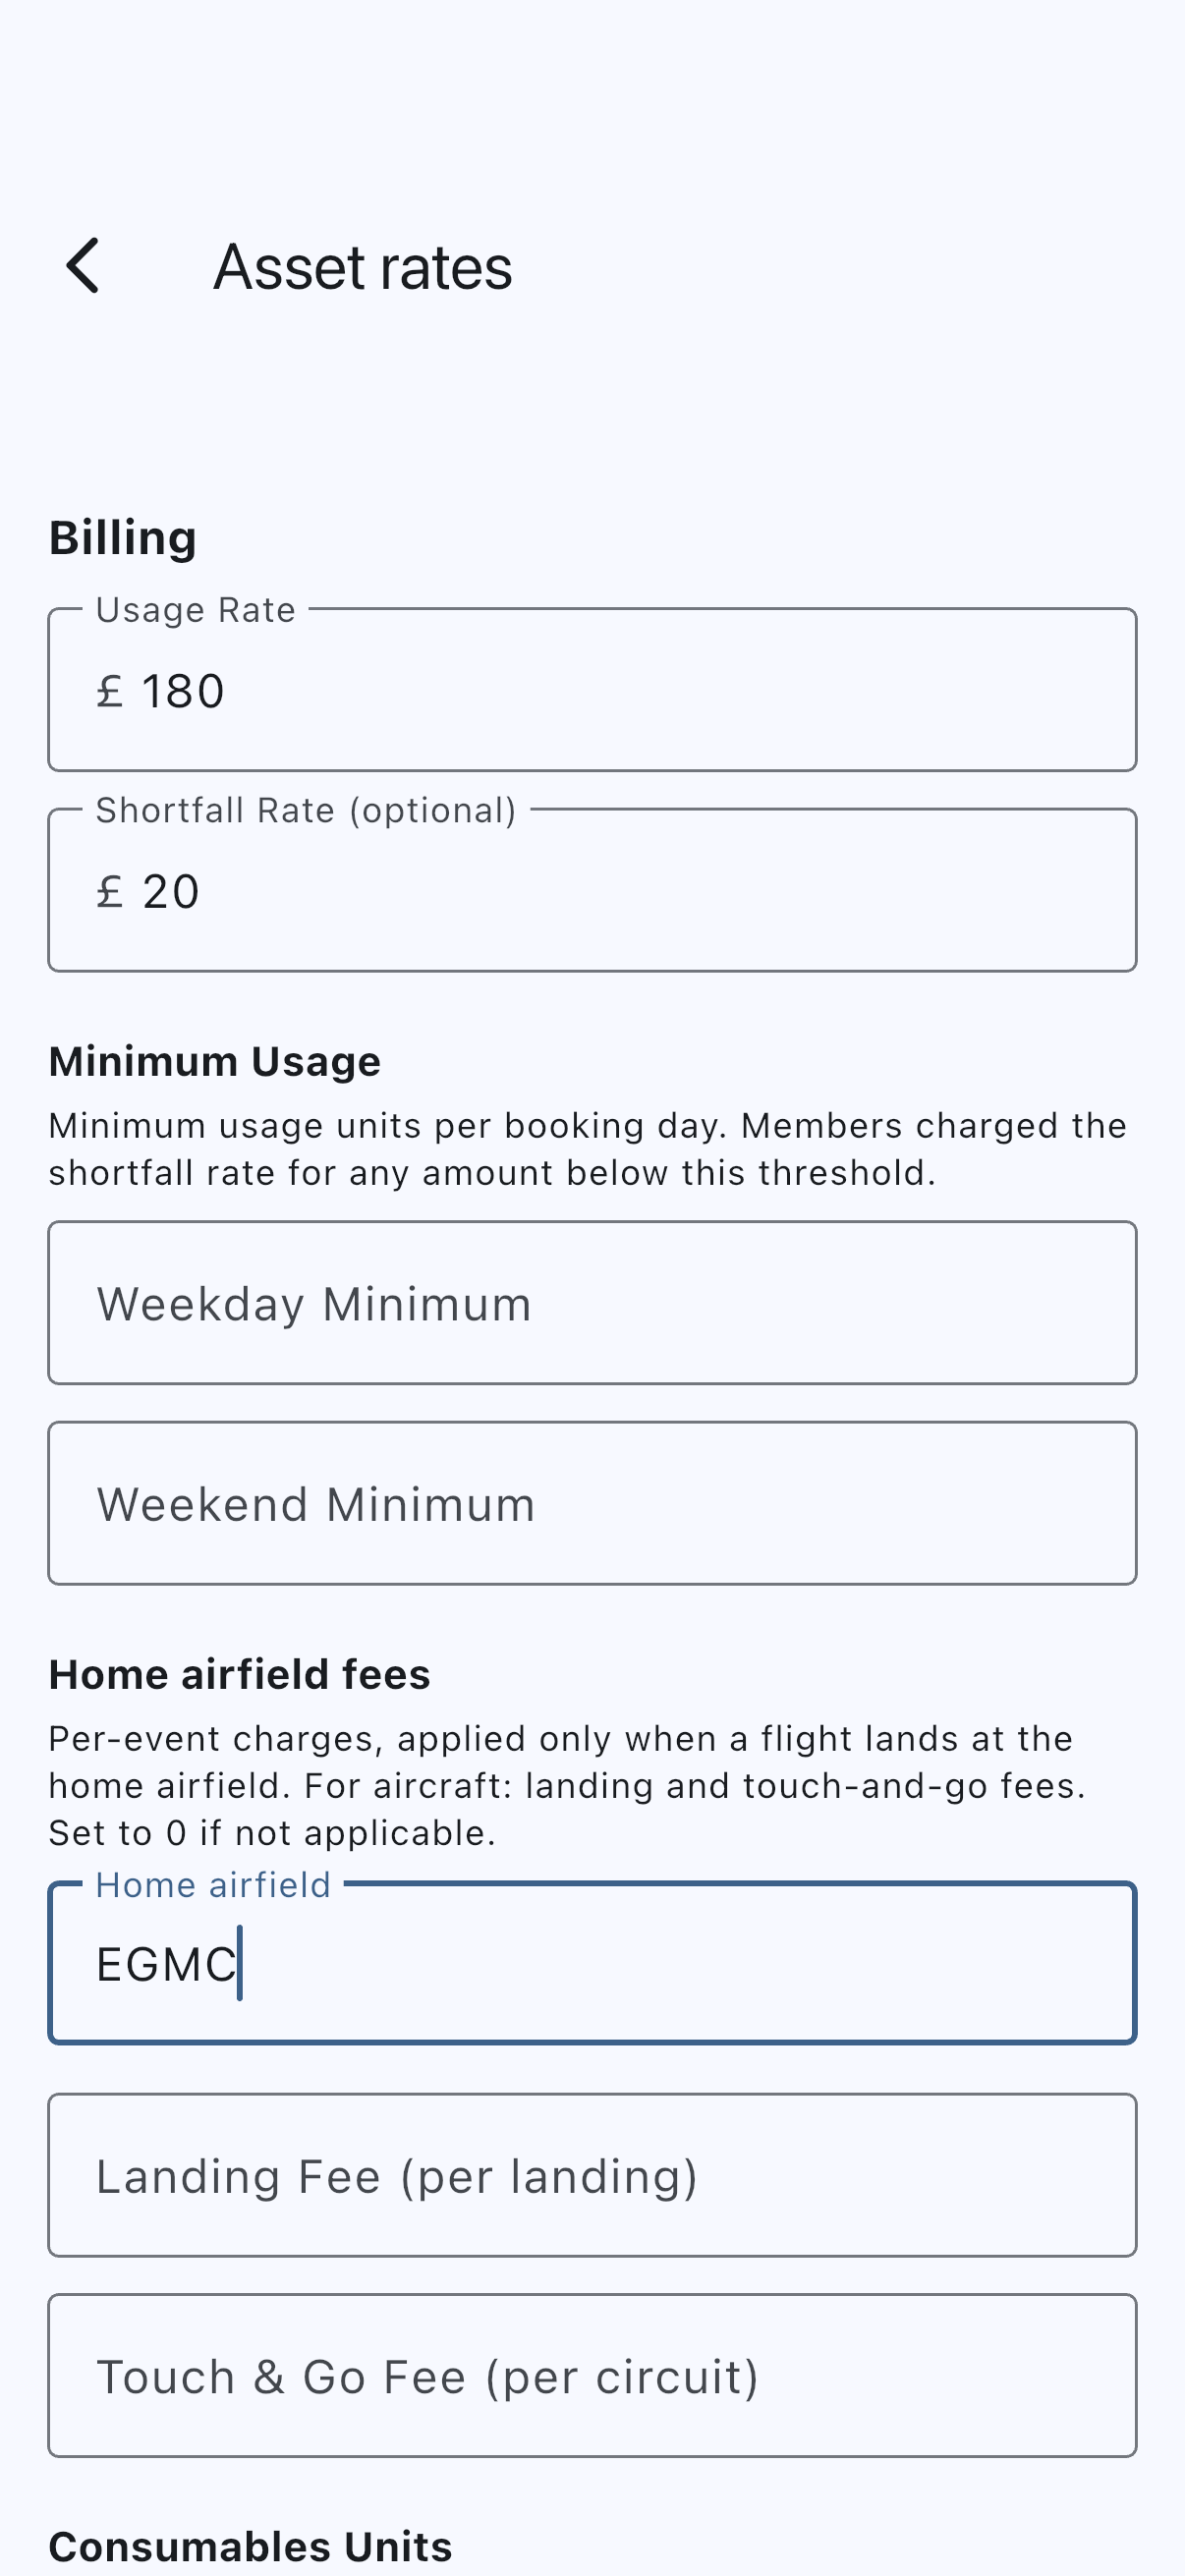
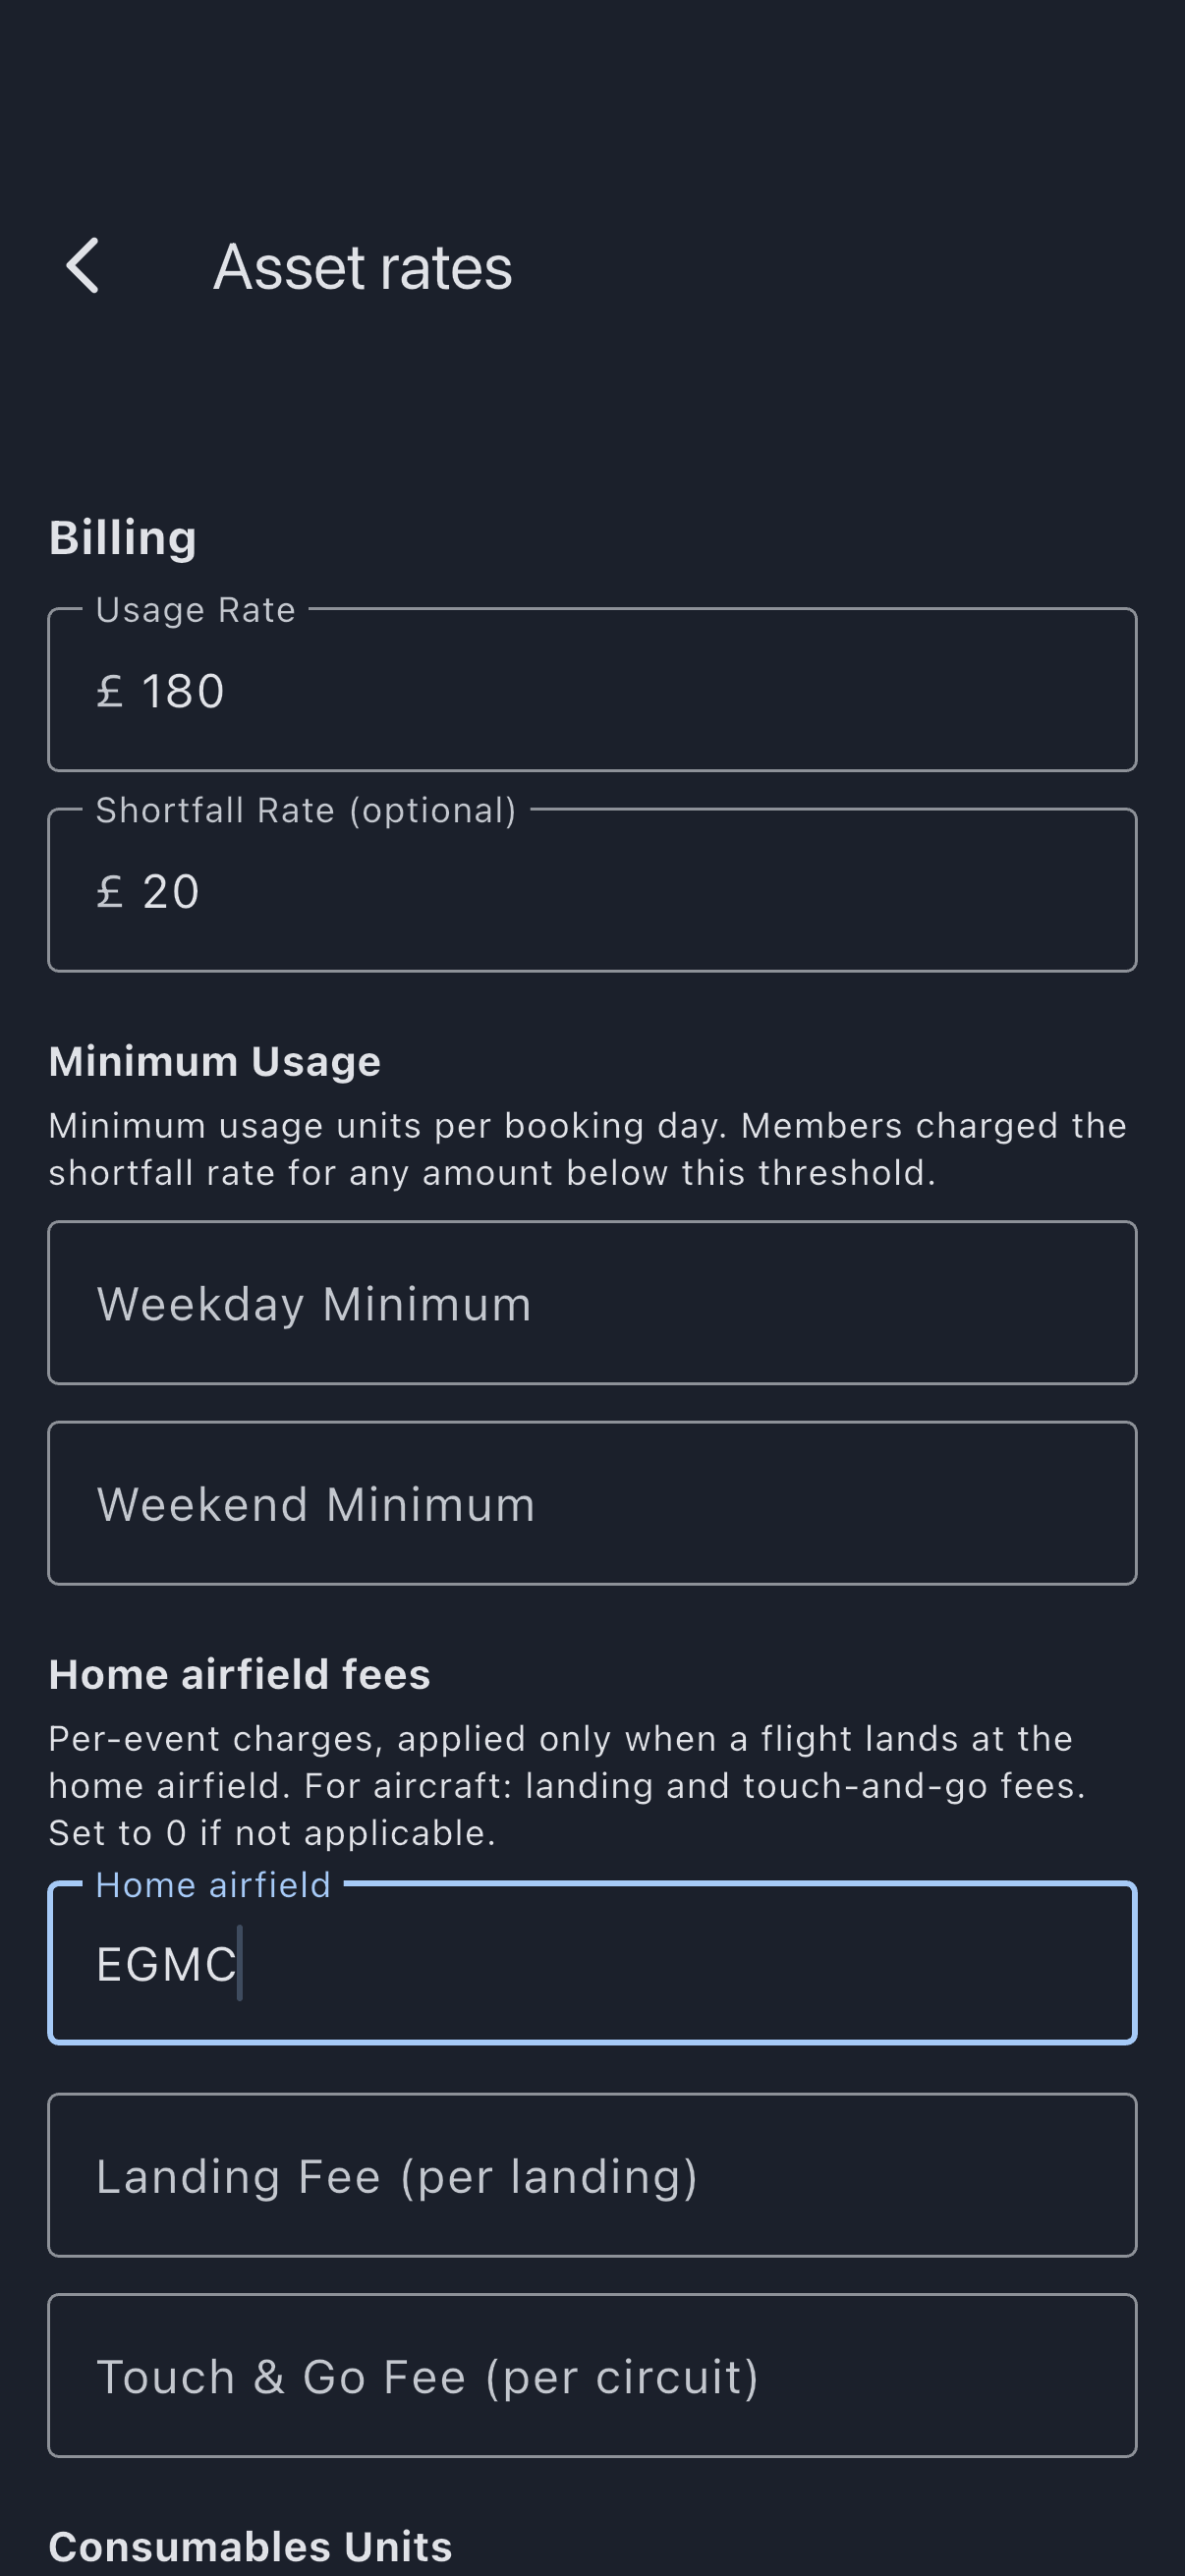
You won’t see a Per-Scheme Rates table yet. It only appears once you add a second rate band; with the single Standard Member band there’s nothing to vary. Tap Save Settings and your rate applies from now on.
What you record on each flight is set separately, under Admin, then Usage capture. The default records the meter you bill by, which is enough to get started.
Step 4: Invite your first member
Section titled “Step 4: Invite your first member”Back on the Admin tab, open Members, then tap the person-add button in the corner. The Invite Member screen opens, with every field already on a sensible default:
- Email (optional): the invitee’s address. Leave it blank to create a link you share yourself.
- Role: Admin, Member or Viewer, opening on Member.
- Equity member: ticked to begin with, with Number of shares on
1. Beneath it, Syndik8 shows the percentage that share works out to once they join. Untick it for a non-owning member and the share count disappears. - Billing Scheme: the rate band they pay on. The default option, Syndicate default, applies the Standard Member band you set rates for in Step 3.
- Welcome Message (optional): a note shown to the invitee on the accept screen.
- Expires In: how long the invitation stays valid, opening on 7 days.
Tap Generate Invitation. A dialog headed Invitation Created offers the join link with Copy and Share buttons; send it to your member whichever way suits.
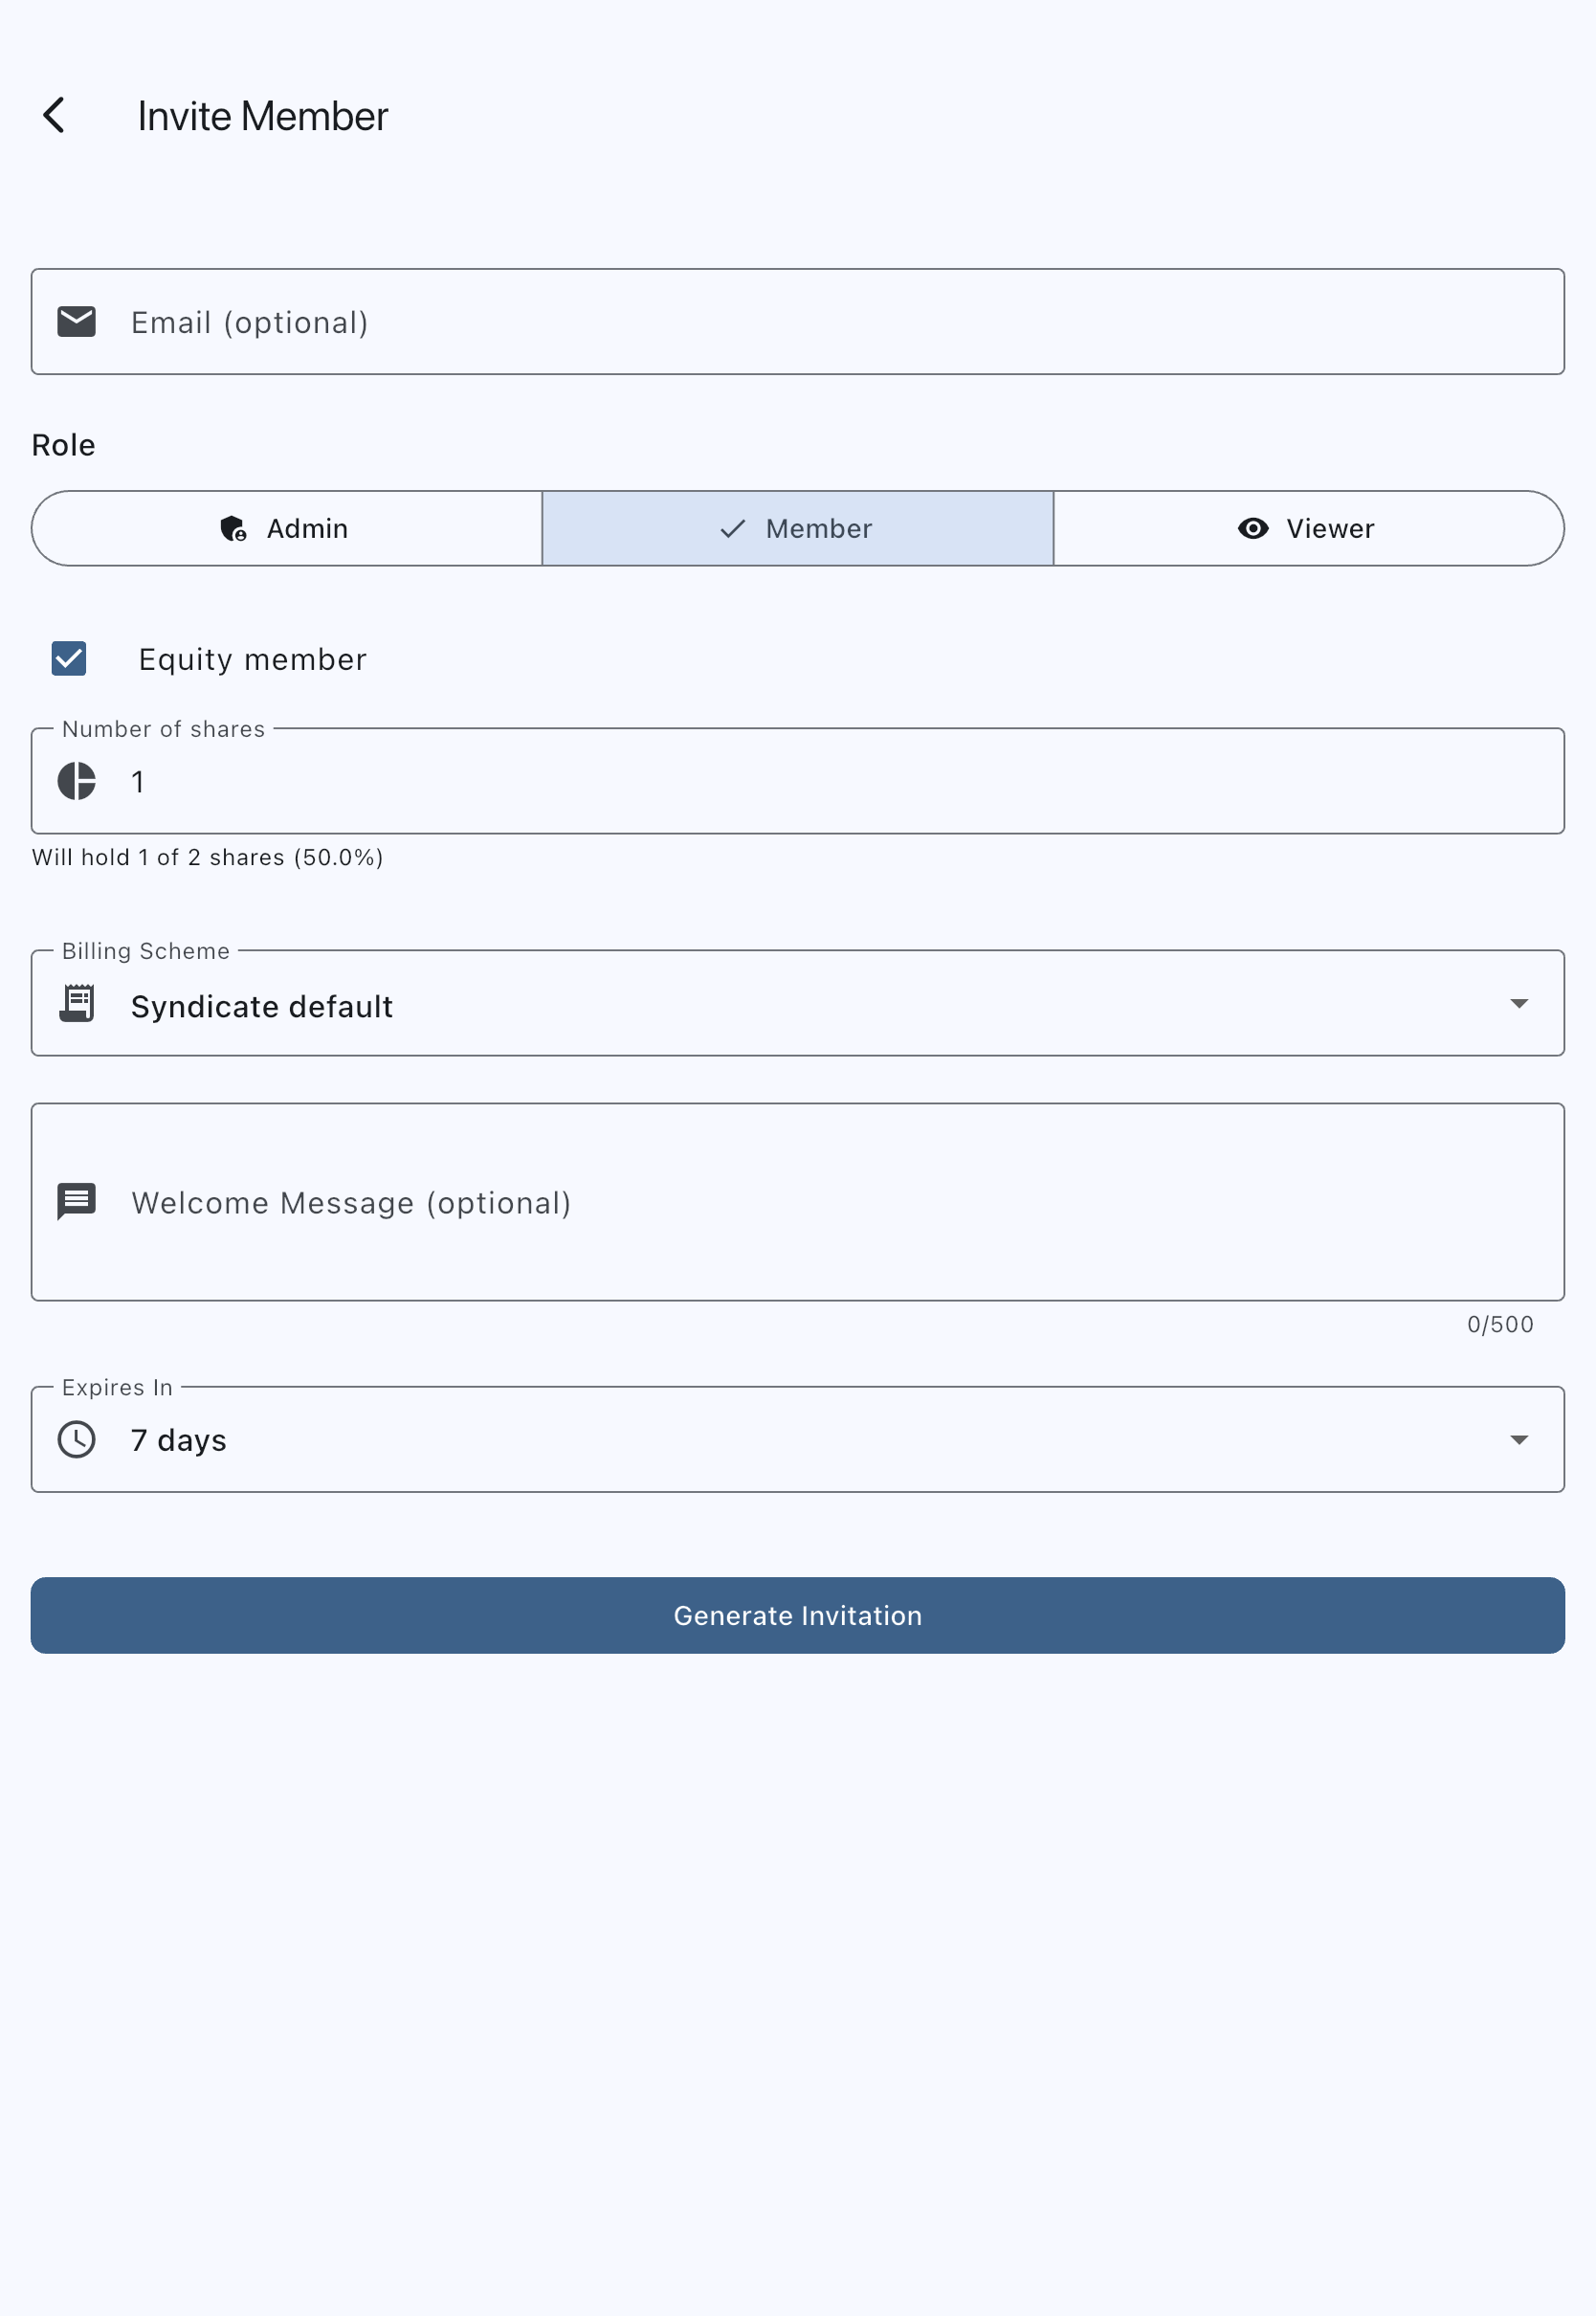
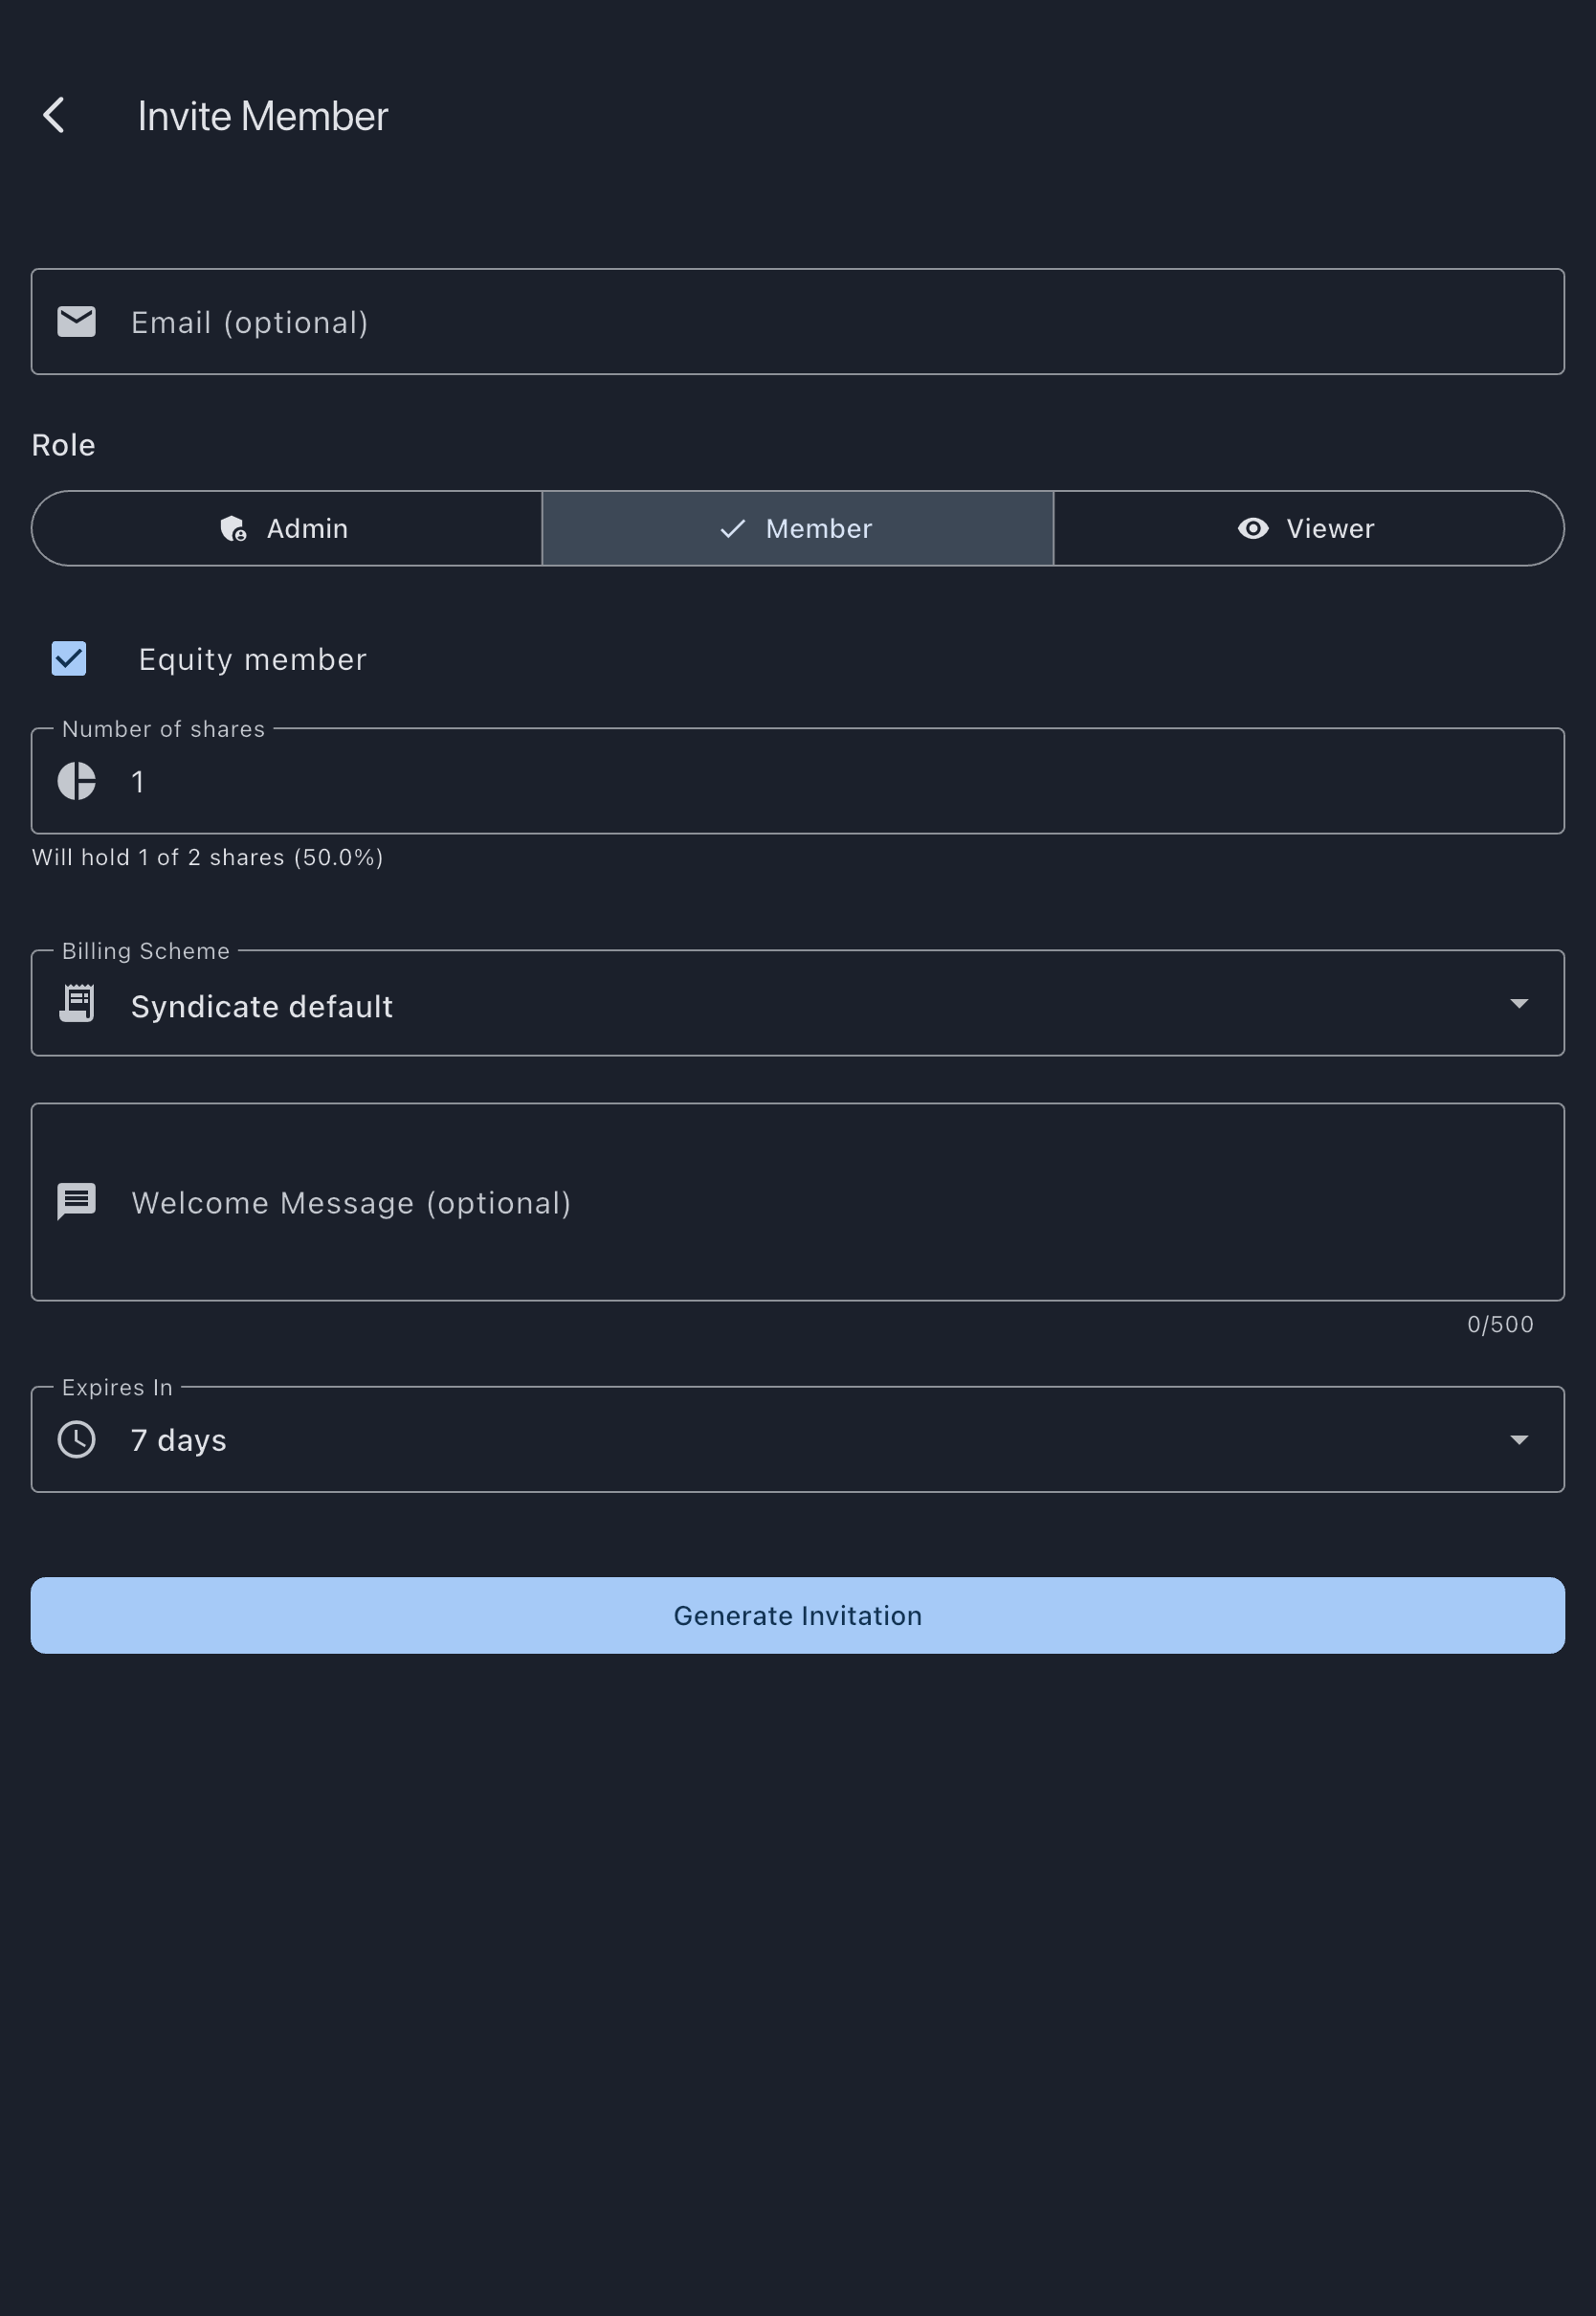
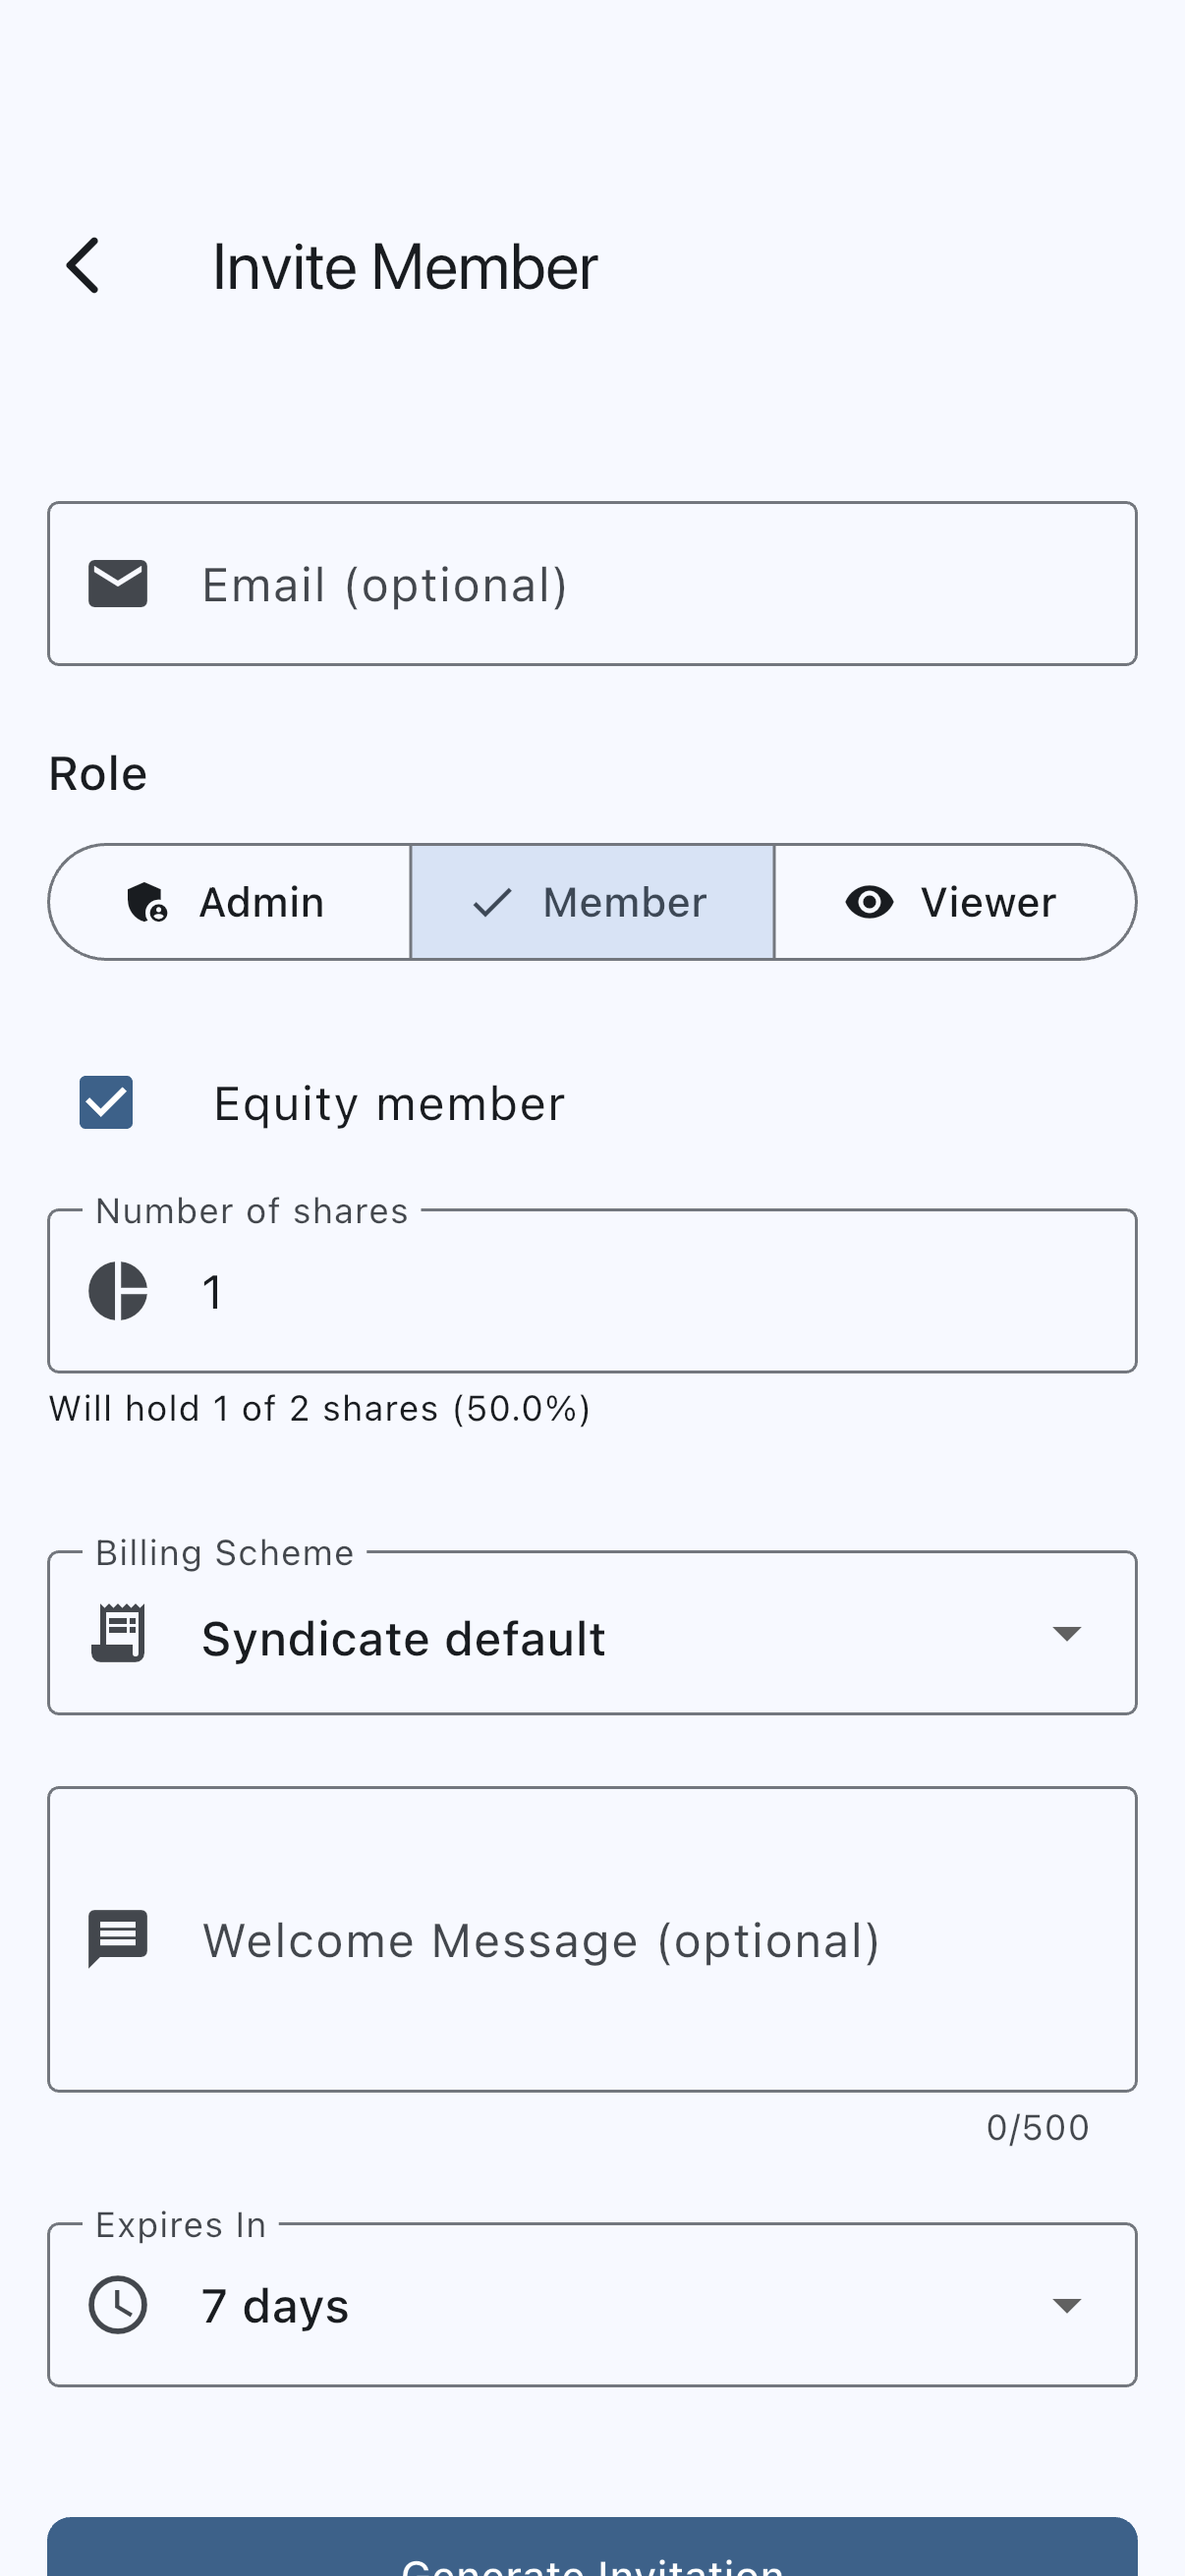
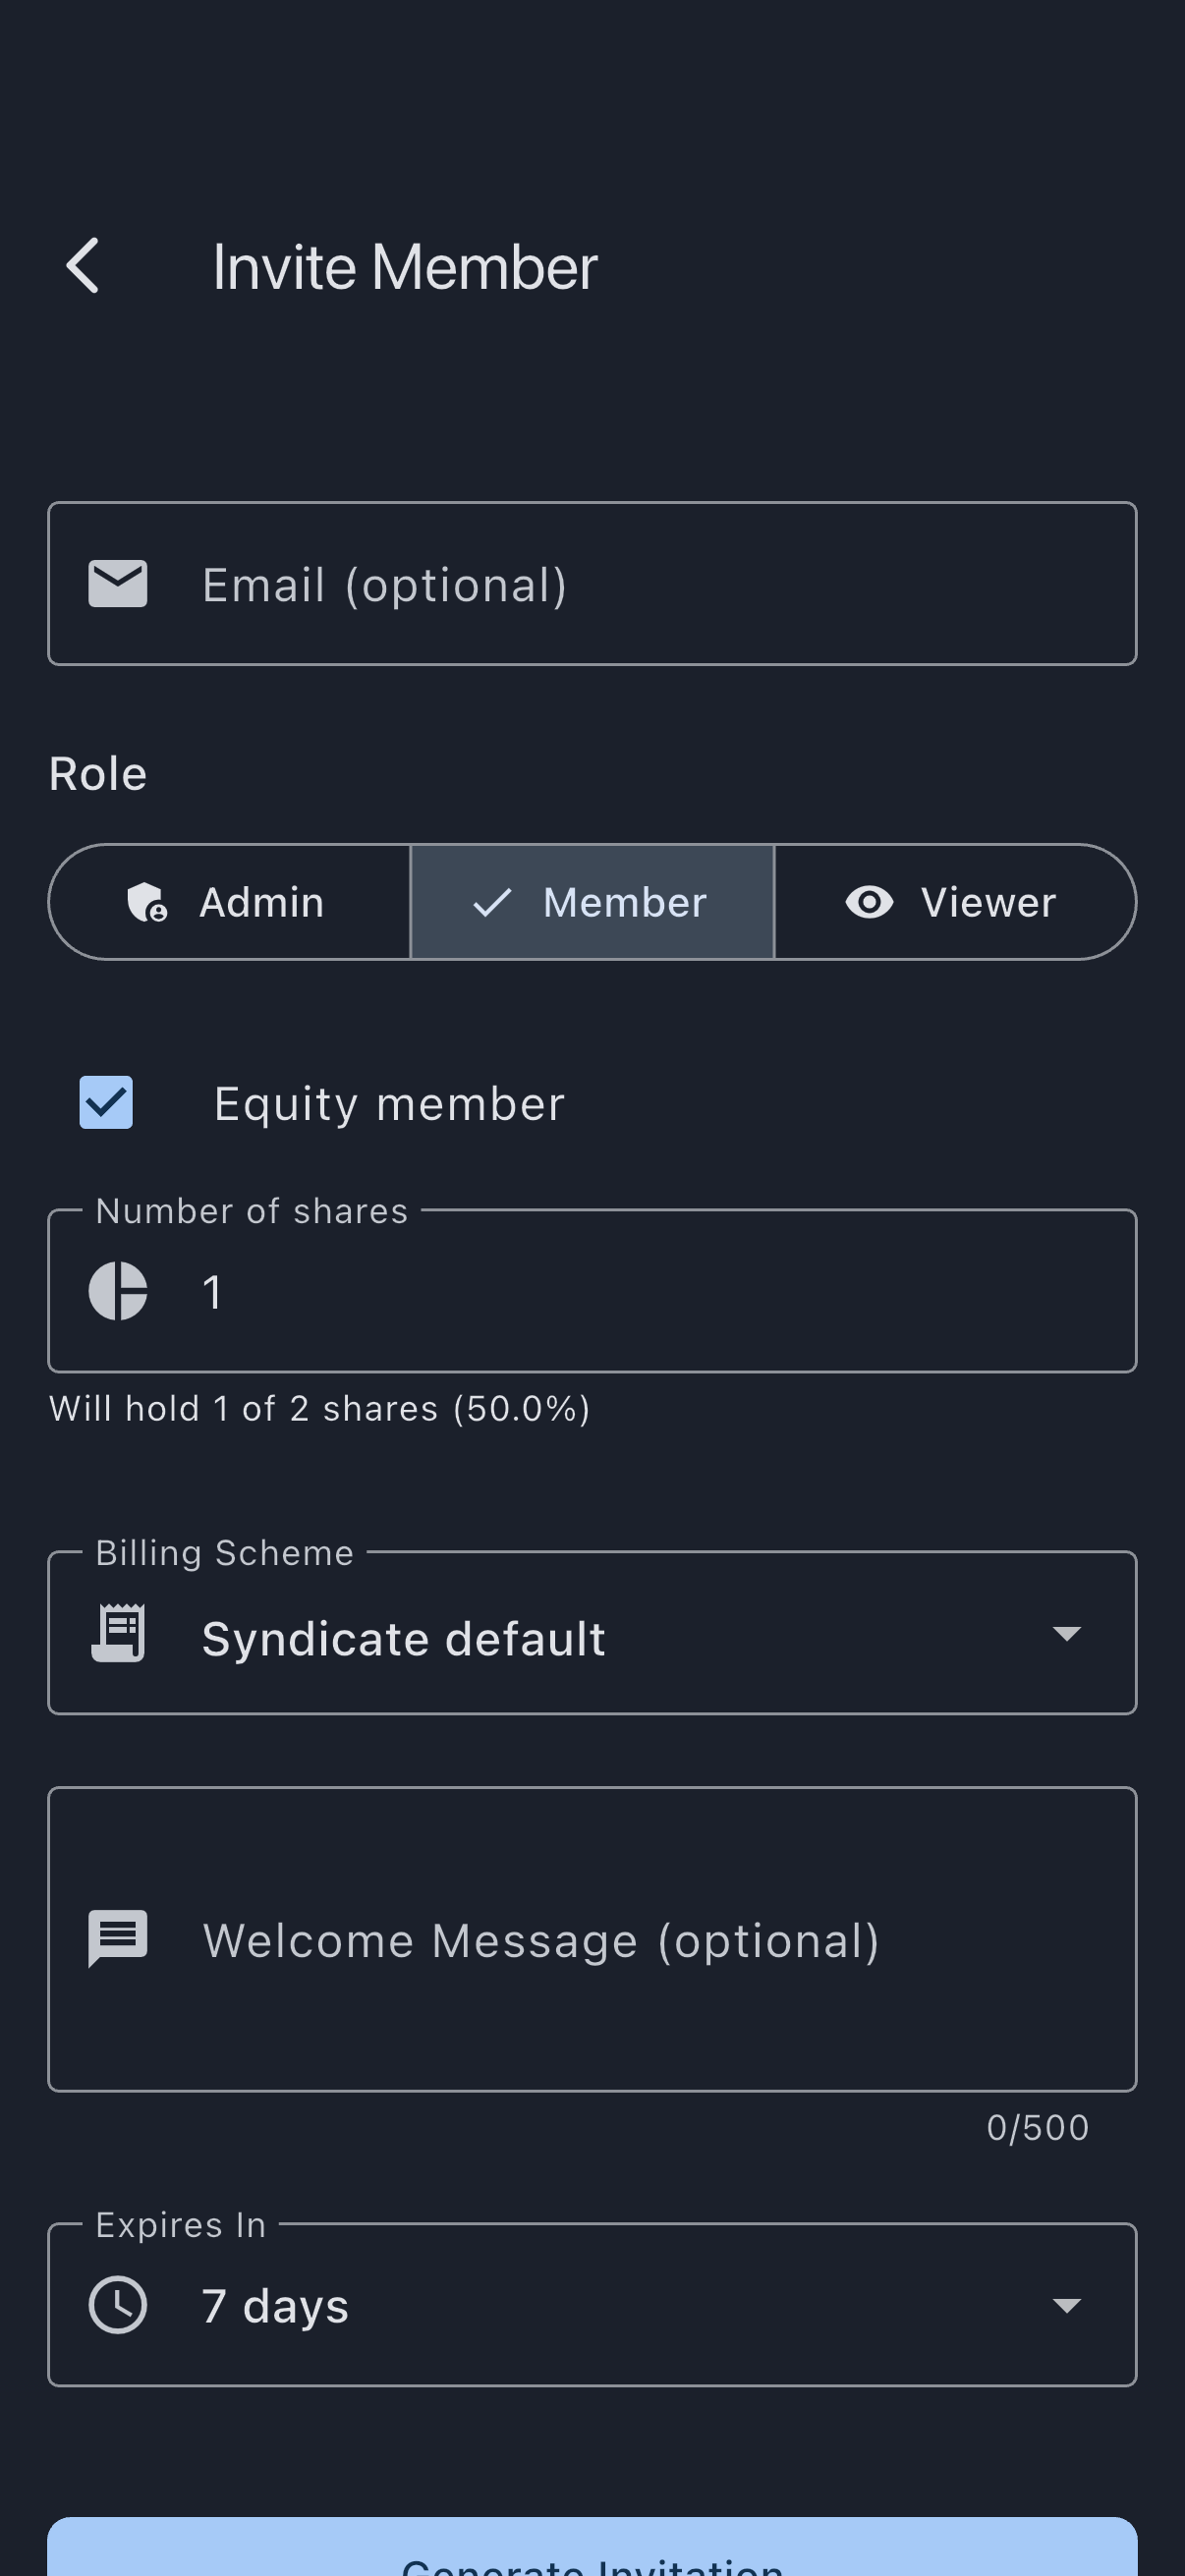
The new invitation shows in the Members list as pending until it’s accepted. This screen offers more than the wizard’s quick invite: the equity share count, the billing scheme, and an expiry are all here.
Step 5 (optional): Payments and subscription
Section titled “Step 5 (optional): Payments and subscription”If your group is a registered company and wants to collect money through Syndik8, that lives under Admin, then Payments. Your Syndik8 subscription sits under Admin, then Subscription. Both are optional to get going and can wait until the flying, and the billing, is real.
What you just did
Section titled “What you just did”- Created your own syndicate alongside the demo and became its first admin.
- Added your first aircraft with its meter reading.
- Set the rate members pay, and (optionally) your home airfield and its fees.
- Sent your first member an invitation.
Where to go next
Section titled “Where to go next”- Kept the demo alongside your own group? It tidies itself up after 14 days of inactivity, or you can delete it now. To move between syndicates, go back to the Home tab and tap the card for the one you want — there’s no picker anywhere else in the app.
- Prefer the guided version? Set up your first syndicate follows the wizard instead.
- Your member picks up the invite in Join a syndicate as a member.
- Then: Log your first flight.
- The rules behind rate bands: Member rates and billing schemes.